안녕하세요. 


오늘은 paloalto에서 SNMP v2를 설정하고 리눅스에서 snmp값을 검색해보겠습니다. 


1. Device -> Server Profiles -> SNMP Trap

그리고 Add버튼을 클릭 합니다. 


2. 아래처럼 설정 합니다. 


3. Device -> Setup -> Operations -> SNMP Setup


SNMP Setup을 클릭 합니다. 


4. 아래처럼 설정 합니다. 


5. 리눅스를 SSH접속 합니다.


아래처럼 입력하면 Linux에서 Paloalto SNMP값을 불러 올수 있습니다. 

kevin@kevin-virtual-machine:~$ sudo snmpwalk -v 2c -c ciscocisco 192.168.10.253
iso.3.6.1.2.1.1.1.0 = STRING: "Palo Alto Networks PA-220 series firewall"
iso.3.6.1.2.1.1.2.0 = OID: iso.3.6.1.4.1.25461.2.3.38
iso.3.6.1.2.1.1.3.0 = Timeticks: (27183886) 3 days, 3:30:38.86
iso.3.6.1.2.1.1.4.0 = STRING: "Not Set"
iso.3.6.1.2.1.1.5.0 = STRING: "PA-220"
iso.3.6.1.2.1.1.6.0 = STRING: "Local"
iso.3.6.1.2.1.1.7.0 = INTEGER: 127
iso.3.6.1.2.1.1.8.0 = Timeticks: (2) 0:00:00.02
iso.3.6.1.2.1.2.1.0 = INTEGER: 27


안녕하세요.


오늘은 PALOALTO에서 BGP가 다운되었을때 Log를 KIWI syslog에 포워딩 해보겠습니다.


Paloalto syslog forwarding Source - > E1/1 192.168.10.253

KIWI syslog Server IP: 192.168.10.103


1. Device -> Setup -> Services -> Services Features


2. Devices -> Log Settings -> system 에서 Add버튼을 클릭 합니다. 


3. 저희는 BGP 관련 Status 상태 정보만 확인하고 Syslog에게 전달하기 위해서 Filter Builder를 클릭 합니다. 


4. 아래 처럼 입력 합니다. 

(eventid eq routed-BGP-peer-enter-established) or (eventid eq routed-BGP-peer-left-established)


뜻 BGP peer가 생성 되었을때 또는 BGP peer가 해제 되었을때는 SYSLOG에 LOG를 전달 합니다.


View Filtered Logs를 클릭해서 실제 로그가 제대로 검색 되는지 확인 합니다. 


5. 정상적으로 로그가 검색 되었습니다.

아래처럼 okay버튼을 클릭 합니다.


6. SYSLOG 서버 IP를 입력 합니다.


7. Click Syslog Profile


8. 아래처럼 입력 합니다. 


9. OK버튼을 클릭 합니다. 


10. Commit를 클릭 합니다.


TIP - Monitor -> Logs -> System에서 아래처럼 검색 가능 합니다. 


윈도우 PC에서 Syslog를 설정 합니다.


이제 실제로 테스트 해보겠습니다.


Paloalto에서 Down되어진 BGP를 UP를 시킵니다. 그리고 Commit를 실행 합니다. 


BGP에 UP이 되면 KIWI syslog에 LOG가 쌓이는지 확인 합니다.


첫번째 로그는 BGP가 UP되었을때

두번째 로그는 BGP가 DOWN되었을때 


정상적으로 동작 합니다. 


이런 방식으로 특정 LOG에 대해서 syslog에 전달해서 관리 가능 합니다. 


안녕하세요. 


오늘은 PALOALTO에서 log를 kiwi syslog에 전달하기 위해서 윈도우 PC에 kiwi syslog를 설치해보겠습니다.


PALOALTO syslog interface 192.168.10.254

Windows PC: 192.168.10.103


1. 공싱 홈페이지에 접속 합니다. 

https://www.solarwinds.com/free-tools/kiwi-free-syslog-server


FREE Kiwi Syslog Server Free Edition | SolarWinds

Whether you want to stay ahead with new tech, speed up modernization, support modular services, cut costs, or stay competitive, we’ve built industry-leading software to maximize hybrid IT, spark innovation, and tackle your toughest IT challenges.

www.solarwinds.com


위에처럼 Download Free Tool를 클릭 합니다.


2. 정보를 입력 하고 아래 Download 버튼을 클릭 합니다. 


3. 다운로드 폴더를 클릭 합니다. 


4. 아래 설치 파일을 클릭 합니다. 


5. 아래 Yes 버튼을 클릭 합니다. 


6. 아래 I agree 버튼을 클릭 합니다. 


7. Next버튼을 클릭 합니다.


8. 아래 Next버튼을 클릭 합니다. 


9. Next버튼을 클릭 합니다. 


10. Install 버튼을 클릭 합니다. 


11. 설치가 완료 될때까지 기다립니다. 


12. Finish 버튼을 클릭 합니다. 

13. 무료 버전은 아래처럼 Source 최대 5개까지 가능 합니다.


지금까지 [PaloAlto FW-#14] - Kiwi Syslog install 글을 읽어주셔서 감사합니다. 

안녕하세요. 


현재 Zabbix를 통해서 PaloAlto site-to-site vpn 모니터링 하기 위해서 여러가지 검색을 했지만. 

팔로알토는 site-to-site vpn snmp를 제공 하지 않는다고 공식적으로 팔로알토 페이지에서 확인 하였습니다.


https://knowledgebase.paloaltonetworks.com/KCSArticleDetail?id=kA10g000000ClgnCAC


Monitoring VPN tunnel down events with SNMP

Monitoring VPN tunnel down events with SNMP 59156 Created On 09/25/18 19:54 PM - Last Modified 06/09/23 07:35 AM Symptom Symptoms Is there a way to generate SNMP traps or generate some type of notification if a VPN tunnel goes down?   Diagnosis A tunne

knowledgebase.paloaltonetworks.com


SYSLOG를 통해서 S2S VPN이 다운 되었다고 LOG를 확인 가능 합니다. 


안녕하세요. 


오늘은 PaloAlto Global Protect cisco DUO PROXY redundancy에 대해서 알아보겠습니다.


https://itblog-kr.tistory.com/93


[PaloAlto FW-#11]- Global Protect(Remote User) with 2FA cisco duo

안녕하세요.  이번에는 PaloAlto Global Protect에서 2FA를 사용해보겠습니다. 2FA은 CISCO DUO입니다. okta도 가능 합니다. Windows Server 설치 아래를 참고 부탁드립니다. https://itblog-kr.tistory.com/66 VM생성/등

itblog-kr.tistory.com


Server01: Active Directory, DNS, Cisco DUO Proxy

Server02: Active Directory, DNS, cisco DUO proxy 


Portal authentication - LDAP -  Server 01, Server01 죽으면 Server02

Gateway Authentication - DUO Proxy 2FA - Server 01, Server 01 죽으면 server02


Cisco DUO Proxy Server01 설정

[ad_client]
host=192.168.10.224
service_account_username=administrator
service_account_password=XXXX
search_dn=DC=mylab,DC=local
timeout=2

[radius_server_auto]
ikey= DUO CLOYD에서 COPY 
skey= DUO CLOYD에서 COPY 
api_host= DUO CLOYD에서 COPY 
radius_ip_1=192.168.10.93
radius_secret_1=XXXXX
failmode=safe
client=ad_client
port=1812


Cisco DUO Proxy Server02 설정

[ad_client]
host=192.168.10.225
service_account_username=administrator
service_account_password=XXXX
search_dn=DC=mylab,DC=local
timeout=2

[radius_server_auto]
ikey= DUO CLOYD에서 COPY 
skey= DUO CLOYD에서 COPY 
api_host= DUO CLOYD에서 COPY 
radius_ip_1=192.168.10.93
radius_secret_1= XXXXX
failmode=safe
client=ad_client
port=1812


1. PALOALTO Radius 설정


2. Authentication Profile 설정


3. Authentication Sequence 설정


4. GP Portal Authentication Protal 설정


LDAP01 우선순위 죽으면 LDAP02


5. GP Gateway authentication 설정


Commit를 누르고 테스트를 진행합니다.


GP 연결 테스트 


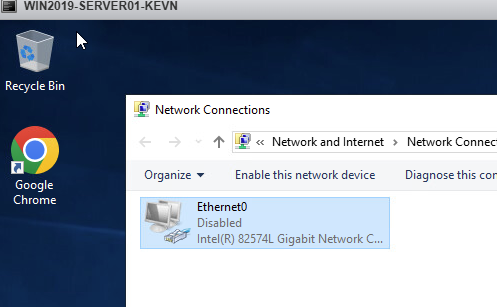
Server01 NIC를 Disable 하고 테스트를 합니다.


지금까지 글을 읽어주셔서 감사합니다.

안녕하세요. 


이번에는 PaloAlto Global Protect에서 2FA를 사용해보겠습니다. 2FA은 CISCO DUO입니다. okta도 가능 합니다.


Windows Server 설치 아래를 참고 부탁드립니다. 

https://itblog-kr.tistory.com/66


[Win2019 Server][#1] - Windows Server 2019 Installation

안녕하세요.  오늘은 VMware Esxi에 Windows Server 2019 trial version를 설치 해서 공부 해보곘습니다.  1. VMware Esxi를 접속 합니다. 가상시스템을 클릭 -> VM생성/등록을 선택 합니다. 2. 다음을 클릭 합니

itblog-kr.tistory.com

Active Directory 설정은 아래를 참고 부탁드립니다. 

https://itblog-kr.tistory.com/68


[Win2019 Server][#3] - Active Directory Installation

안녕하세요. 이번에는 Windows Server 2019에서 Active Directory를 설치해보겠습니다.  1. Server Manager를 클릭 합니다. 2. Local Server -> Ethernet0를 선택합니다. 서버는 IP주소가 DHCP가 아닌 Static으로 설정 되

itblog-kr.tistory.com

PaloAlto Global Protect 설정은 아래를 참고 부탁드립니다.

https://itblog-kr.tistory.com/89


[PaloAlto FW-#7]- Global Protect(Remote User)

안녕하세요. 이번에는 PaloAlto에서 Global Protect(remote user) 설정에 대해서 알아보겠습니다. 토폴로지는 아래와 같습니다. E1/1을 global protect를 설정 하고 팔로알토 로컬 유저를 통해서 인증을 시도

itblog-kr.tistory.com


https://itblog-kr.tistory.com/90


[PaloAlto FW-#8]- Global Protect(Remote User) with different port

안녕하세요. 오늘은 PaloAlto에서 Global Protect(Remote User) 설정하는데 디폴트 포트443이 아닌 다른 포트로 Global Protect를 설정하는 방법에 대해서 알아보겠습니다. 토폴로지는 아래와 같습니다.  MGMT

itblog-kr.tistory.com


1. Cisco DUO Cloud 계정을 생성합니다. 10 Users까지는 무료로 사용 가능합니다.

   Windows Server는 최소 2016이어야 합니다.

   Cisco DUO Cloud 


https://duo.com/


Identity Security, MFA & SSO

Protect your workforce with Cisco Duo’s industry leading suite of identity security solutions, Single Sign-On (SSO), and Multi-Factor Authentication (MFA).

duo.com


계정 생성하는 방법에 대해서는 생략 하겠습니다.


2. 로그인 합니다. 


3. Applications -> Protect an application 

paloalto를 Search하고 Protect버튼을 클릭합니다.


4.  PaloAlto Documentation를 클릭합니다.


Detail에 Integration key와 Secret Key 그리고 API hostname은 나중에 설명하겠습니다.


5. 윈도우 서버에서 아래 duo proxy프로그램을 다운로드 받고 설치 합니다. 


6. Cisco Duo authentication proxy manager를 실행합니다.


아래처럼 수정 합니다.

[ad_client]
host=192.168.10.224
service_account_username=administrator
service_account_password=XXXX
search_dn=DC=mylab,DC=local
timeout=2

[radius_server_auto]
ikey= DUO CLOYD에서 COPY 
skey= DUO CLOYD에서 COPY 
api_host= DUO CLOYD에서 COPY 
radius_ip_1=192.168.10.93
radius_secret_1= XXXXX
failmode=safe
client=ad_client
port=1812


설정값을 저장하고, Restart를 실행합니다. 


7. DUO Cloud 유저를 생성합니다.

AD에서 주기적으로 DUO CLOUD에 동기화 할수 있고 Manual하게 User를 설정 할 수도 있습니다.


휴대폰 정보를 입력합니다. 


그리고 Cisco DUO 프로그램을 아이폰에서 다운로드 합니다. 

그리고 휴대폰을 cisco DUO cloud에 등록 시킵니다. 


휴대폰을 cisco DUO cloud에 정식적으로 등록하지 않으면 cisco DUO를 아이폰에서 실행해도 아무것도 보이지 않습니다.


등록해야지 아래처럼 정보값이 보입니다. 


8. PaloAlto 에서 설정해보겠습니다.


Portal 인증은 AD01과 AD02를 통해서 인증 하도록 하겠습니다

Gateway은 Cisco DUO Proxy를 통해서 휴대폰 push notification을 이용해서 인증해보겠습니다.


Portal Authetication 설정값입니다. 


9. Radius를 설정합니다.


10. Authentication Profile를 생성합니다.


11. Portal authentication 설정은 LADP을 통해서 인증합니다


12. Gateway를 설정합니다.


13. Commit하고 테스트를 진행 합니다.


Approve버튼을 클릭하면 아래처럼 GP가 연결이 완료 되었습니다.


지금까지 PaloAlto Global Protect -2FA에 대해서 알아보았습니다. 

글을 읽어주셔서 감사합니다.


안녕하세요. 


이번에는 Active Directory 01 과 Active Directory 02를 설치 하고 PaloAlto 에서 Global Protect(Remote User) AD01, AD02 이중화 설정 하겠습니다.


PaloAlto입장에서는 AD01이 죽으면 AD02로 연결되게 설정 가능합니다.

L4 처럼 Load-Banlcing은 불가능 합니다. 만약에 Traffic를 분산화 하고 싶으면 L4 스위치를 구매해서 구성해야 합니다.


Active Directory01

IP: 192.168.10.224

Domain: mylab.local

User: Kevin1, Kevin2


Active Directory02

IP: 192.168.10.225

Domain: mylab.local

User: Kevin1, Kevin2


1. LDAP01을 설정합니다.


2. LDAP02를 설정합니다.


3. Authentication Profile를 설정 합니다.


4. Authentication Sequence를 설정합니다.


5. Global Protect Portal에서 Authentication 정보를 수정합니다.


6. Global Protect- Gateway에서 Authentication를 수정합니다.


7. Commit를 실행합니다.

8. 테스트를 진행 합니다.

Active Directory01, Active Directory02가 모두다 정상인 상태


Active Directory01 LAN카드를 Disable 합니다.


그리고 다시 GP를 테스트 합니다. AD01이 Down되었다는걸 인지 해야하기 때문에, GP가 연결되기까지 2배 이상에 시간이 걸립니다.


AD01이 다운되어도 AD02를 통해서 GP USER 인증이 가능 합니다. 


지금까지 글을 읽어주셔서 감사합니다. 

안녕하세요.


이번에는 PaloAlto Global Protect(Remote User)를 인증할때 PaloAlto User를 사용하는게 아니라 Active Directory을 통해서 GP User를 인증해 보겠습니다. 


1. Windows Server 설치 아래를 참고 부탁드립니다. 

https://itblog-kr.tistory.com/66


[Win2019 Server][#1] - Windows Server 2019 Installation

안녕하세요.  오늘은 VMware Esxi에 Windows Server 2019 trial version를 설치 해서 공부 해보곘습니다.  1. VMware Esxi를 접속 합니다. 가상시스템을 클릭 -> VM생성/등록을 선택 합니다. 2. 다음을 클릭 합니

itblog-kr.tistory.com


2. Active Directory 설정은 아래를 참고 부탁드립니다. 

https://itblog-kr.tistory.com/68


[Win2019 Server][#3] - Active Directory Installation

안녕하세요. 이번에는 Windows Server 2019에서 Active Directory를 설치해보겠습니다.  1. Server Manager를 클릭 합니다. 2. Local Server -> Ethernet0를 선택합니다. 서버는 IP주소가 DHCP가 아닌 Static으로 설정 되

itblog-kr.tistory.com


3. PaloAlto Global Protect 설정은 아래를 참고 부탁드립니다.

https://itblog-kr.tistory.com/89


[PaloAlto FW-#7]- Global Protect(Remote User)

안녕하세요. 이번에는 PaloAlto에서 Global Protect(remote user) 설정에 대해서 알아보겠습니다. 토폴로지는 아래와 같습니다. E1/1을 global protect를 설정 하고 팔로알토 로컬 유저를 통해서 인증을 시도

itblog-kr.tistory.com


https://itblog-kr.tistory.com/90


[PaloAlto FW-#8]- Global Protect(Remote User) with different port

안녕하세요. 오늘은 PaloAlto에서 Global Protect(Remote User) 설정하는데 디폴트 포트443이 아닌 다른 포트로 Global Protect를 설정하는 방법에 대해서 알아보겠습니다. 토폴로지는 아래와 같습니다.  MGMT

itblog-kr.tistory.com


Active Directory 서버 정보 입니다.

IP: 192.168.10.224 

Domain: mylab.local


User생성 합니다.


1. PALOALTO LADP를 설정합니다

Type: active-directory

Base DN: DC=mylab,DC=local

Bind DN: administrator@mylab.local 

그리고 패스워드를 입력합니다

bind timeout: 2 seconds 

search timeout 2 seconds 


2. Authentication Profile 


3. Global Protect Portal를 Authentication 수정 합니다.


4. Global Protect Gateway에서 Authentication 수정 합니다. 


그리고 Commit를 실행합니다.


5. PaloAlto SSH로 연결 합니다.

admin@PA-VM> test authentication authentication-profile LADP01 username kevin1 password 
Enter password : 

Target vsys is not specified, user "kevin1" is assumed to be configured with a shared auth profile.

Do allow list check before sending out authentication request...
name "kevin1" is in group "all"

Authentication to LDAP server at 192.168.10.224 for user "kevin1"
Egress: 192.168.10.93
Type of authentication: plaintext
Starting LDAP connection...
Succeeded to create a session with LDAP server
DN sent to LDAP server: CN=kevin1,CN=Users,DC=mylab,DC=local
User expires in days: never

Authentication succeeded for user "kevin1"

admin@PA-VM> 


Profile 테스트 했을때 위에 처럼 성공하였습니다.


이번에는 GP 프로그램을 이용해서 직접 테스트 해보겠습니다


192.168.10.97 55555


연결이 완료 되었습니다


지금까지 Global Protect 인증할때 Active Directory를 사용해서 인증해보았습니다. 

글을 읽어주셔서 감사합니다. 

안녕하세요.


오늘은 PaloAlto에서 Global Protect(Remote User) 설정하는데 디폴트 포트443이 아닌 다른 포트로 Global Protect를 설정하는 방법에 대해서 알아보겠습니다.


토폴로지는 아래와 같습니다. 


MGMT 192.168.10.93/24 GW 192.168.10.253

E1/1 192.168.10.97/24 GW 192.168.10.253
E1/3 30.1.1.254/24


1. Zone를 생성합니다. 

Network -> Zones - Add 


Name: GP

Log Setting: None

Type: Layer3:


그리고 Okay버튼을 클릭 합니다. 


2. E1/1 Interface를 설정합니다.


3. Default Gateway를 설정합니다


4. Tunnel Interface를 생성합니다.


5. Loopback주소를 생성 합니다. GP 주소로 사용 될 예정입니다.


6. Certificate를 생성합니다.


192.168.10.71은 DNAT될 주소입니다. 

192.168.10.97 55555로 GP패킷이 들어오면, 192.168.10.71 443으로 포트포워딩 합니다.

그래서 GP gateway에서 사용할 certificate주소는 192.168.10.71이 필요합니다.

이 certificate은 GP_ROOT_CA로 인증되어야 합니다. 


7.  SSL/TLS Service Profile를 생성 합니다.


8. Local User를 생성 합니다.


9. Authentication Profile 생성


10. Global Portal를 생성합니다.


11. Global Protect Gateway 생성


12. DNAT생성 합니다.


13. Policy 정책을 생성합니다.


Commit를 실행 합니다. 


14. Test

테스트 PC에서 telnet 192.168.10.97 55555 실행합니다. 


포트가 정상적으로 동작합니다.


정상적으로 동작합니다. 


192.168.10.97 55555 입력하면 DNAT를 통해서 192.168.10.71 443 Global Portal and gateway에 접속하여 GP 연결을 완료 하였습니다.


이번에는 

192.168.10.97 55555 Production GP USER를 사용한다고 가정합니다. GP USER IP - 80.1.1.100-80.1.1.200

192.168.10.97 55556 Test GP USER또는 파트너 들이 사용한다고 가정합니다.  GP USER IP - 90.1.1.100-90.1.1.200


IP주소가 다르기때문에, IP기반으로 방화벽 정책을 가능합니다. 


1. Loopback 222를 생성합니다.


2. Tunnel를 생성합니다.


3. Certificate를 생성합니다.


4. SSL/TLS Service Profile를 생성합니다. 


5. Global Protal를 생성합니다.


6. Gateway를 생성합니다.


7. DNAT를 생성합니다.


8. 방화벽 정책은 이전에 생성 하였기 때문에 생략합니다.


9. 테스트를 진행합니다.

192.168.10.97 55556


IP주소가 90.1.1.x/24이기 떄문에, 이 대역은 TEST구간에 장비들만 접속가능하게 설정해서 Test USER 또는 파트너사들에게 제공 가능합니다.


가장 좋은 방법은 공인 IP가 두개 있으면 공인 IP주소로 사용 해도 상관없습니다.

공인 IP주소가 1개인경우 DNAT를 이용해서 이렇게 사용 가능 합니다.


지금까지 글을 읽어주셔서 감사합니다.

안녕하세요.


이번에는 PaloAlto에서 Global Protect(remote user) 설정에 대해서 알아보겠습니다.


토폴로지는 아래와 같습니다. 

E1/1을 global protect를 설정 하고 팔로알토 로컬 유저를 통해서 인증을 시도해보겠습니다.


1. Global Protect사용할 Zone를 생성

Network -> Zones -> Add


Name: GP

Type: Layer3

Enable user identification: Check

2. Tunnel Interface 생성


3. Certificate 생성

아래 처럼 입력하고 Generate버튼을 클릭 합니다. 


Root CA 생성 하였습니다. 

5.  SSL/TLS Service Profile 생성


아까 생성한 Certificate를 선택합니다. 


6. GP에 사용할 User를 생성하고 Auth-Profile를 생성합니다.


AUTH-PROFILE 생성


7. Global Protect Protal Configuration


아까 생성한 SSL/TLS profile를 선택하고 Add버튼을 클릭 합니다. 


Username아니면 Certificate 방식 두개중 한개 인증되면 허용 하게 선택 합니다. 


Add버튼을 클릭 합니다. 


Add버튼을 클릭 합니다. 


8. Gateway configuration


Add를 클릭 합니다. 


User가 GP에 연결되었을때 받아갈 IP주소를 선택합니다. 


30.1.1.0/24에 대해서만 Tunnel을 이용해서 GP내부에 통신 가능하게 설정

Split Tunnel 그리고 Okay버튼 클릭


9. 방화벽 정책 추가


OK 버튼을 클릭합니다.


10. Commit를 실행하고 테스트를 진행 합니다. 

IP주소를 설정하고 GW를 INT_ROUTER로 설정합니다. 


E1/1 GP IP에 Ping테스트


GP를 설치하고 아래처럼 IP주소 입력


그리고 Username과 Password를 입력 합니다. 


그리고 VPC에 30.1.1.1에 Ping이 가능합니다.


지금까지 Global Protect(Remote VPN)에 대해서 알아보았습니다.

글을 읽어주셔서 감사합니다. 

안녕하세요.


이번에는 PaloAlto에서 Internet 회선이 두개있을때 ISP01이 Main ISP02가 Backup으로 동작할 수 있도록 설정해보겠습니다.


E1/1 10.1.1.254 - Main Internet Metric 10

E1/2 20.1.1.254 - Backup Internet Metric 100


Forwarding Table를 확인하면 아래처럼 GW01이 Metric10이어서 선택되었습니다.


1. GW01에서 8.8.8.8 Moniter를 설정 하겠습니다.


2. commit를 실행 합니다.

3. VPC에서 Ping를 무한으로 실행합니다.

VPCS> ping 8.8.8.8 -c 10000

84 bytes from 8.8.8.8 icmp_seq=1 ttl=55 time=25.751 ms
84 bytes from 8.8.8.8 icmp_seq=2 ttl=55 time=8.481 ms


4. PaloAlto에서 확인해보면 현재 모니터링이 잘 되고 있습니다. 


5. E1/1를 Disable 합니다. 

그리고 VPC Ping를 모니터링 합니다.


6. 팔로알토 방화벽 Static Monitering를 확이합니다.


8.8.8.8 모니터링이 실패하고 Default Gateway가 바뀌었습니다.


7. 이번에는 E1/1 Enable해보겠습니다.


8.  82초 이후로 GW01로 변경됩니다.


Monitor이 UP이 되고 GW01로 변경되었습니다. VPC에서 Ping도 정상적으로 잘 동작합니다. 


지금까지 글을 읽어주셔서 감사합니다.


안녕하세요.


이번에는 30.1.1.1 PC가 외부에 인터넷이 가능 하도록 설정해 보겠습니다.


토폴로지는 아래와 같습니다. 


1. INT_Router를 설정 하도록 하겠습니다. 

en
conf t
ho INT_Router
int g0/0
ip add 192.168.10.92 255.255.255.0
no sh
int g0/1
ip add 10.1.1.1 255.255.255.0
no sh
int g0/2
ip add 20.1.1.1 255.255.255.0
no sh
ip route 0.0.0.0 0.0.0.0 192.168.10.253


2. Check INT_Router 

Router#show ip int brie
Interface                  IP-Address      OK? Method Status                Protocol
GigabitEthernet0/0         192.168.10.92   YES manual up                    up      
GigabitEthernet0/1         10.1.1.1        YES manual up                    up      
GigabitEthernet0/2         20.1.1.1        YES manual up                    up      
GigabitEthernet0/3         unassigned      YES unset  administratively down down    
Router#

Router#show ip route
Codes: L - local, C - connected, S - static, R - RIP, M - mobile, B - BGP
       D - EIGRP, EX - EIGRP external, O - OSPF, IA - OSPF inter area 
       N1 - OSPF NSSA external type 1, N2 - OSPF NSSA external type 2
       E1 - OSPF external type 1, E2 - OSPF external type 2
       i - IS-IS, su - IS-IS summary, L1 - IS-IS level-1, L2 - IS-IS level-2
       ia - IS-IS inter area, * - candidate default, U - per-user static route
       o - ODR, P - periodic downloaded static route, H - NHRP, l - LISP
       a - application route
       + - replicated route, % - next hop override, p - overrides from PfR

Gateway of last resort is 192.168.10.253 to network 0.0.0.0

S*    0.0.0.0/0 [1/0] via 192.168.10.253
      10.0.0.0/8 is variably subnetted, 2 subnets, 2 masks
C        10.1.1.0/24 is directly connected, GigabitEthernet0/1
L        10.1.1.1/32 is directly connected, GigabitEthernet0/1
      20.0.0.0/8 is variably subnetted, 2 subnets, 2 masks
C        20.1.1.0/24 is directly connected, GigabitEthernet0/2
L        20.1.1.1/32 is directly connected, GigabitEthernet0/2
      192.168.10.0/24 is variably subnetted, 2 subnets, 2 masks
C        192.168.10.0/24 is directly connected, GigabitEthernet0/0
L        192.168.10.92/32 is directly connected, GigabitEthernet0/0
Router#


3. ping 8.8.8.8

Router#ping 8.8.8.8
Type escape sequence to abort.
Sending 5, 100-byte ICMP Echos to 8.8.8.8, timeout is 2 seconds:
!!!!!
Success rate is 100 percent (5/5), round-trip min/avg/max = 3/3/4 ms
Router#


4. INT_Router에서 SNAT를 설정 합니다. 

int g0/0
ip nat outside
int g0/1
ip nat inside
int g0/2
ip nat inside

access-list 1 permit any
ip nat inside source list 1 interface g0/0 overload


5. Test - Source를 변경해서 외부로 Ping를 하면 제대로 동작 합니다. 

INT_ROUTER#ping 8.8.8.8 source g0/1
Type escape sequence to abort.
Sending 5, 100-byte ICMP Echos to 8.8.8.8, timeout is 2 seconds:
Packet sent with a source address of 10.1.1.1 
!!!!!
Success rate is 100 percent (5/5), round-trip min/avg/max = 3/3/5 ms
INT_ROUTER#ping 8.8.8.8 source g0/2
Type escape sequence to abort.
Sending 5, 100-byte ICMP Echos to 8.8.8.8, timeout is 2 seconds:
Packet sent with a source address of 20.1.1.1 
!!!!!
Success rate is 100 percent (5/5), round-trip min/avg/max = 3/3/7 ms
INT_ROUTER#


6. Router에서 NAT table test

INT_ROUTER#show ip nat translations 
Pro Inside global      Inside local       Outside local      Outside global
icmp 192.168.10.92:3   10.1.1.1:3         8.8.8.8:3          8.8.8.8:3
icmp 192.168.10.92:4   20.1.1.1:4         8.8.8.8:4          8.8.8.8:4
INT_ROUTER#


이제 PaloAlto에서 확인해보겠습니다.


1. Static route를 설정합니다.


2. Add를 클릭 합니다. 


3. GW01를 설정합니다. Metric 10


4. GW02를 설정합니다.


5. NAT를 설정합니다.


6. 이번에는 SNAT02를 만듭니다. 

7. Policy를 설정합니다


7. VPC 에서 Ping 8.8.8.8 시도 합니다.

VPCS> ping 8.8.8.8

84 bytes from 8.8.8.8 icmp_seq=1 ttl=55 time=30.465 ms
84 bytes from 8.8.8.8 icmp_seq=2 ttl=55 time=6.784 ms
84 bytes from 8.8.8.8 icmp_seq=3 ttl=55 time=7.433 ms
84 bytes from 8.8.8.8 icmp_seq=4 ttl=55 time=6.824 ms
84 bytes from 8.8.8.8 icmp_seq=5 ttl=55 time=6.570 ms

VPCS> 


방화벽에서 Policy 그리고 NAT hit count 확인


지금까지 PaloAlto에서 SNAT에 대해서 알아보았습니다.

글을 읽어주셔서 감사합니다. 

안녕하세요.


이번에는 PaloAlto Interface Mgmt에 대해서 알아보겠습니다.

PaloAlto interface에 Ping, http, https등 Enable하기위해서는 Interface Mgmt Profile를 만들고 interface에 할당 해야 합니다.


토폴로지는 아래와 같습니다. 


1.  VPC에서 30.1.1.254 ping를 시도 합니다.

VPCS> ping 30.1.1.254

30.1.1.254 icmp_seq=1 timeout
30.1.1.254 icmp_seq=2 timeout
30.1.1.254 icmp_seq=3 timeout
30.1.1.254 icmp_seq=4 timeout
30.1.1.254 icmp_seq=5 timeout

VPCS> 
VPCS> 


실패 합니다.


2. Interface Mgmt Profile를 설정 합니다.

Network ->Interface Mgmt -> Add


Trust-Profile 설정


Untrust-Profile 설정


3. Interface에 할당합니다. 


E1/1 - Untrust-Profile

E1/2 -Untrust-Profile

E1/3 - Trust-Profile


4. Commit를 실행 합니다.

5. VPC에서 다시 Default Gateway로 PIng를 시도 합니다. 

VPCS> ping 30.1.1.254

84 bytes from 30.1.1.254 icmp_seq=1 ttl=64 time=18.113 ms
84 bytes from 30.1.1.254 icmp_seq=2 ttl=64 time=2.498 ms
84 bytes from 30.1.1.254 icmp_seq=3 ttl=64 time=2.753 ms
84 bytes from 30.1.1.254 icmp_seq=4 ttl=64 time=2.241 ms
84 bytes from 30.1.1.254 icmp_seq=5 ttl=64 time=3.220 ms

VPCS> 


지금까지 PaloAlto Interface Mgmt Profile에 대해서 알아보았습니다.

지금까지 글을 읽어주셔서 감사합니다. 

안녕하세요.


이번에는 Zone에 대해서 알아보겠습니다.

PaloAlto 방화벽은 Zone based 방화벽 입니다. 

Interface는 Zone에 할당되어야 하고 방화벽 정책에 적용 할때는 Zone를 기준으로 정책이 할당 됩니다.


이번에는 Zone를 생성하고 Zone를 Interface에 할당 하는 방법에 대해서 알아보겠습니다.


1. 장비에 접속 합니다.  

    https://192.168.10.91


2.  Network -> Zones -> Add 


3. Trust Zone를 생성합니다.


4. Untrsut Zone를 생성 합니다.

5.Interface에 IP주소를 설정하고 Zone를 할당 합니다. 


E1/1

IP: 10.1.1.254/24

Zone: Untrust


E1/2

IP: 20.1.1.254/24

Zone: Untrust


E1/3

IP: 30.1.1.254/24

Zone: Trust


5-1 E1/1 설정


5-2 E1/2 서정


5-3 E1/3 설정


6. 설정을 다 하고 Commit를 실행합니다.


아래처럼 링크가 활성화 되었습니다. 


VPC IP를 설정 합니다. 


VPCS> ip 30.1.1.1 255.255.255.0 30.1.1.254
Checking for duplicate address...
VPCS : 30.1.1.1 255.255.255.0 gateway 30.1.1.254

VPCS> save
Saving startup configuration to startup.vpc
.  done

VPCS> ping 30.1.1.254

30.1.1.254 icmp_seq=1 timeout
30.1.1.254 icmp_seq=2 timeout
30.1.1.254 icmp_seq=3 timeout
30.1.1.254 icmp_seq=4 timeout
30.1.1.254 icmp_seq=5 timeout

VPCS> 


하지만 위와 같이 Default Gateway로 Ping를 실패하였습니다. 


팔로알토는 보안 장비이기 때문에 Interface mgmt profile이 Interface에 적용 되어야지 PIng이 가능 합니다. 

이 부분은 다음글에서 확인하겠습니다. 


지금까지 글을 읽어주셔서 감사합니다. 

안녕하세요.


이번에는 admin password를 reset하는 방법에 대해서 알아보겠습니다. 


admin@PA-VM>configure
admin@PA-VM# set mgt-config users admin password
Enter password   :


새로운 패스워드를 입력합니다.


그리고 GUI에 장비 접속해서 새로운 패스워드를 입력하면 접속 가능 합니다.


지금까지 글을 읽어주셔서 감사합니다. 

안녕하세요. 


오늘은 PaloAlto 방화벽 MGMT Interface를 설정해 보겠습니다.


EVE-NG를 실행하고 아래와 같이 구성도를 만들고 장비들을 실행합니다.


MGMT IP: 192.168.10.91 

Subnet Mask: 255.255.255.0

GW: 192.168.10.253


Default 로그인 정보

admin/admin


1. 로그인하고 password를 수정 합니다. 


2. 아래처럼 수동으로 IP를 설정 합니다. 

admin@PA-VM>configure
admin@PA-VM#set deviceconfig system type static
admin@PA-VM#set deviceconfig system ip-address 192.168.10.91 netmask 255.255.255.0 default-gateway 192.168.10.253
admin@PA-VM# commit

....55%98%............100%
configuration committed successfully


3. PC에서 PIng를 시도 합니다.


4. 장비에 접속합니다.


https://192.168.10.91

아래 버튼을 클릭 합니다. 


5. 장비를 로그인 합니다. 


6. 아래처럼 정상적으로 로그인 하였습니다. 


7. PaloAlto CLI에서 MGMT Interface IP 확인 하는 방법

admin@PA-VM> show interface management


-------------------------------------------------------------------------------
Name: Management Interface
Link status:
  Runtime link speed/duplex/state: 1000/full/up
  Configured link speed/duplex/state: auto/auto/auto
MAC address:
  Port MAC address 50:00:00:57:00:00

Ip address: 192.168.10.91
Netmask: 255.255.255.0
Default gateway: 192.168.10.253
Ipv6 address: unknown
Ipv6 link local address: fe80::5200:ff:fe57:0/64
Ipv6 default gateway:
-------------------------------------------------------------------------------


-------------------------------------------------------------------------------
Logical interface counters:
-------------------------------------------------------------------------------
bytes received                    1125962
bytes transmitted                 38322540
packets received                  10374
packets transmitted               20812
receive errors                    0
transmit errors                   0
receive packets dropped           7
transmit packets dropped          0
multicast packets received        0
-------------------------------------------------------------------------------

admin@PA-VM>


지금까지 PaloAlto 방화벽에서 MGMT IP설정하는 방법에 대해서 알아보았습니다.

글을 읽어주셔서 감사합니다. 

+ Recent posts