
안녕하세요.
오늘은 Cisco ASA Remote Access VPN에서 사용할 인증서 Self Signed Certificate를 생성하고 이 인증서는 Remote Access VPN용으로 사용해 보겠습니다.
1. 시간을 설정합니다.
| conf t clock set 13:48:00 17 Apr 2025 or ntp server 64.235.61.113 |
2. Hostname이랑 Domain-name를 설정합니다.
| conf t hostname asa1 domain-name kevin.rest |
3. key 생성 -
key name: VPN-RSA-KEY
| asa1(config)# crypto key generate rsa label VPN-RSA-KEY modulus 1024 INFO: The name for the keys will be: VPN-RSA-KEY Keypair generation process begin. Please wait... asa1(config)# asa1(config)# show crypto key mypubkey rsa | begin VPN-RSA-KEY Key name: VPN-RSA-KEY Usage: General Purpose Key Modulus Size (bits): 1024 Storage: config Key Data: 30819f30 0d06092a 864886f7 0d010101 05000381 8d003081 89028181 00f63a7d bfa01ce5 e5f2eebb 08fca4a2 225a2e68 ac1132cd 3d38ee18 095932ef 6f793164 4081cb1c 7c8a24f2 0e274bb7 bb6aa2c6 21c8ddc9 8ec71c91 aa2e8324 98f499ea abcece44 44dd1932 7f78e3aa ef13a478 06a285f5 a6188d31 19d7ebaa 5526b86c f91a4e56 85e11dbc 58b42a15 c45e9f9b 2b9d5ca8 335934ee 3d59a593 f7020301 0001 asa1(config)# |
trustpoint 설정
name: SELF_RA_VPN
| asa1(config)# crypto ca trustpoint SELF_RA_VPN asa1(config-ca-trustpoint)# enro asa1(config-ca-trustpoint)# enrollment sel asa1(config-ca-trustpoint)# enrollment self asa1(config-ca-trustpoint)# fqd asa1(config-ca-trustpoint)# fqdn asa1.kevin.rest asa1(config-ca-trustpoint)# sub asa1(config-ca-trustpoint)# subject-name CN=asa1.kevin.rest asa1(config-ca-trustpoint)# ke asa1(config-ca-trustpoint)# keypa asa1(config-ca-trustpoint)# keypair VPN-RSA-KEY asa1(config-ca-trustpoint)# asa1(config)# crypto ca enroll SELF_RA_VPN % The fully-qualified domain name in the certificate will be: asa1.kevin.rest % Include the device serial number in the subject name? [yes/no]: no Generate Self-Signed Certificate? [yes/no]: yes asa1(config)# |
RA VPN 인증서 outside 설정
| asa1(config)# ssl trust-point SELF_RA_VPN outside asa1(config)# |
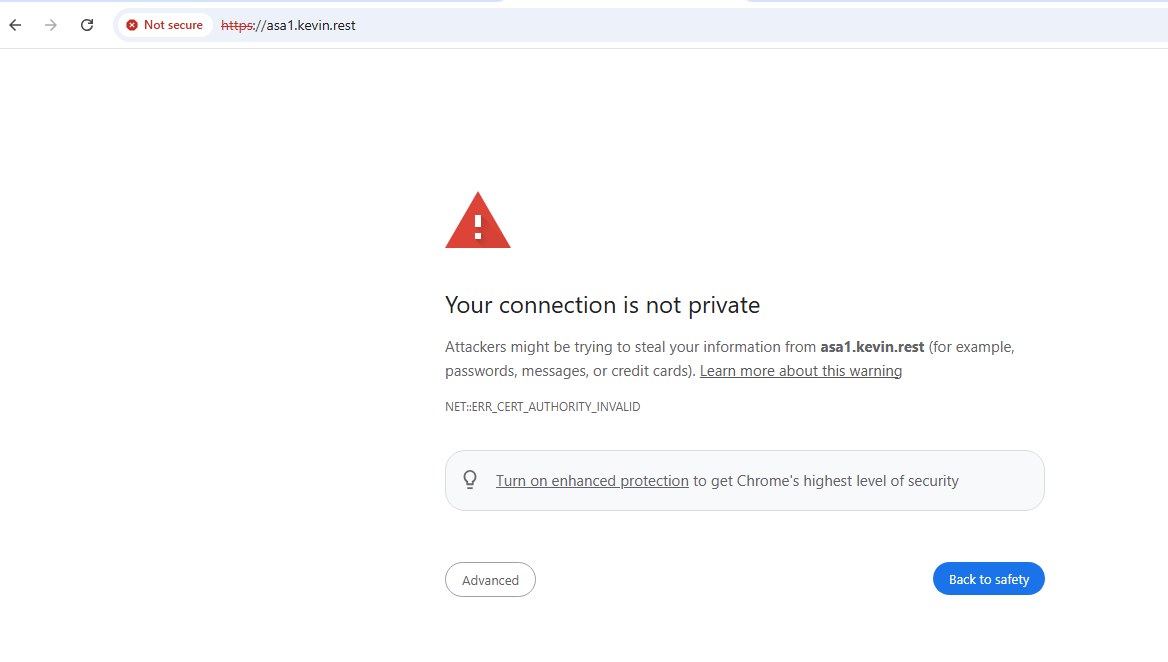
테스트를 합니다.
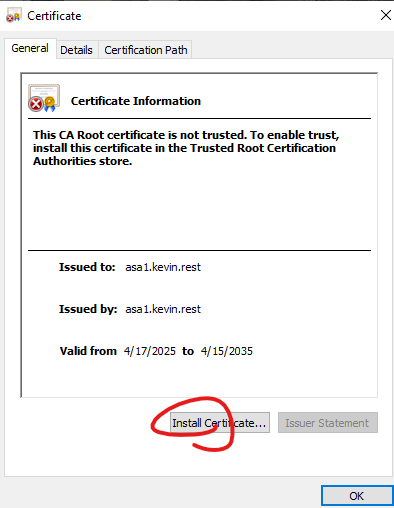
CA인증기관으로 부터 인증 받은 인증서가 아니기때문에, 아래처럼 Certificate Warning Message가 발생합니다.
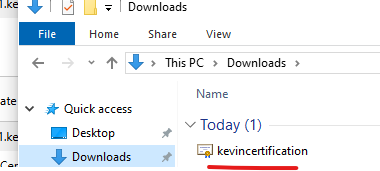
인증서를 PC에 설치 합니다.
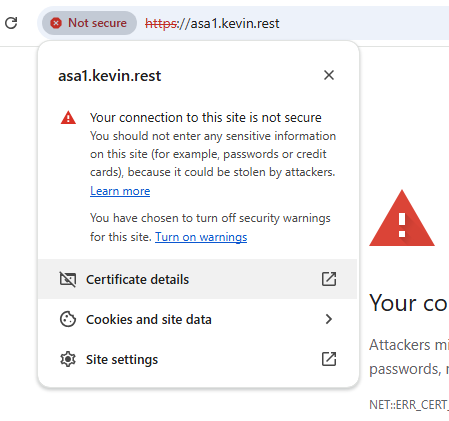
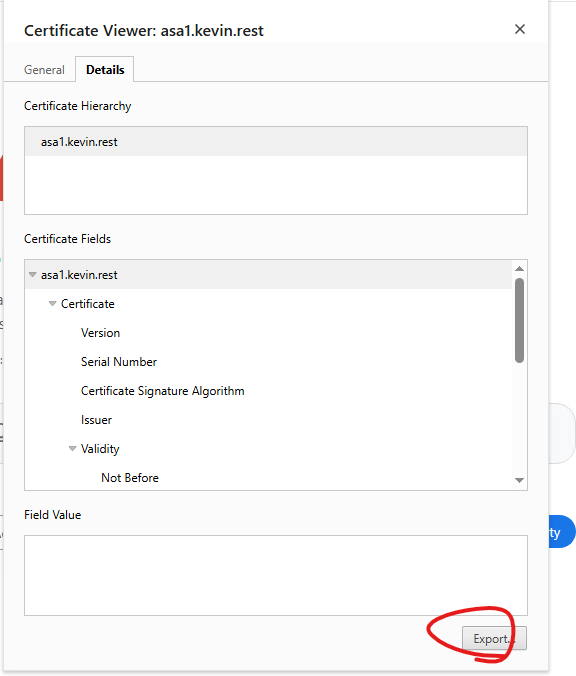
인증서를 외부로 저장 합니다.
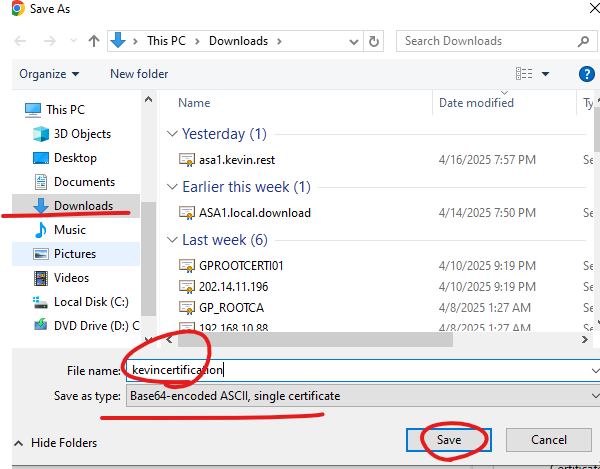
인증서를 클릭해서 설치 합니다.
Install Certificate버튼을 클릭 합니다.
Local Machine - Next버튼을 클릭 합니다.
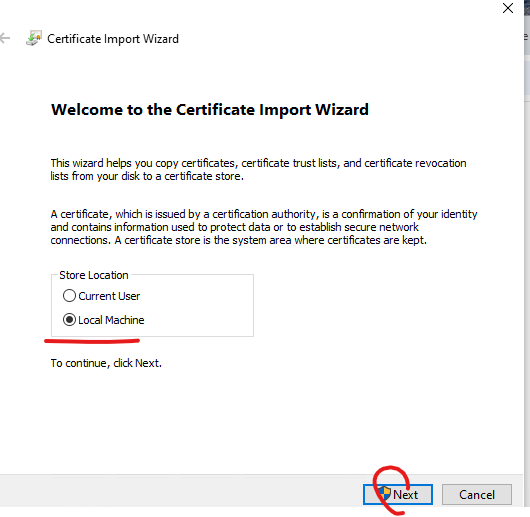
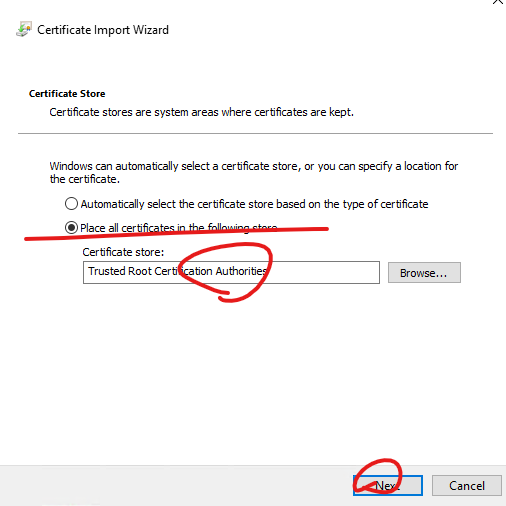
아래처럼 설정합니다.
인증서는 Trusted Root Certification Authorities 폴더에 저장 해야 합니다.
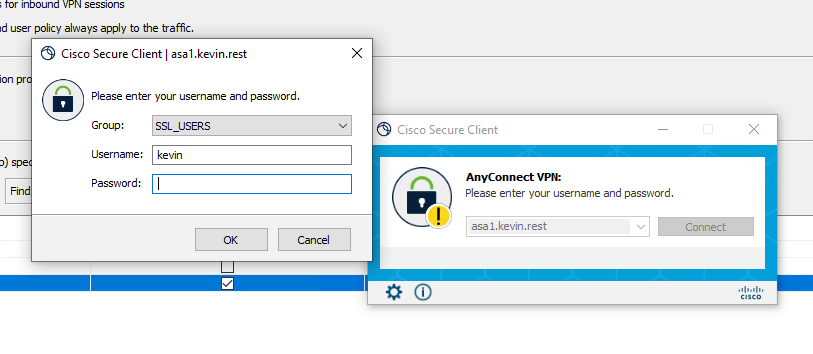
아래처럼 인증서 에러없이 RA VPN 접속 가능 합니다.
'CISCO > ASA 방화벽' 카테고리의 다른 글
| [ASA #11] - Godaddy SSL VPN for remote access VPN (0) | 2025.05.28 |
|---|---|
| [ASA #10] - Godaddy Domain for remote access VPN (0) | 2025.05.28 |
| [ASA #08] - SSL (0) | 2025.04.17 |
| [ASA #07] - NTP and NTP zone configuration (0) | 2025.04.15 |
| [ASA #06] - Remote Access VPN current user check (0) | 2025.02.02 |