안녕하세요.
오늘은 주제는 [2024][EVE-NG #2] 네트워크 시뮬레이션 EVE-NG 설치하기(VMware Player)입니다.
EVE-NG를 설치하기 전에 EVE-NG가 무엇인지 궁금하신 분은 아래 블로그 글을 참조 부탁드립니다.
[EVE-NG #1] 네트워크 시뮬레이션 EVE-NG란?
안녕하세요. 오늘은 저랑 같이 네트워크 시뮬레이션 EVE-NG를 알아보도록 하겠습니다. 1. 네트워크 시뮬레이션이 무엇인가요? 네트워크를 공부 하기 위해서는 실습이 중요합니다. 네트워크 시뮬
itblog-kr.tistory.com
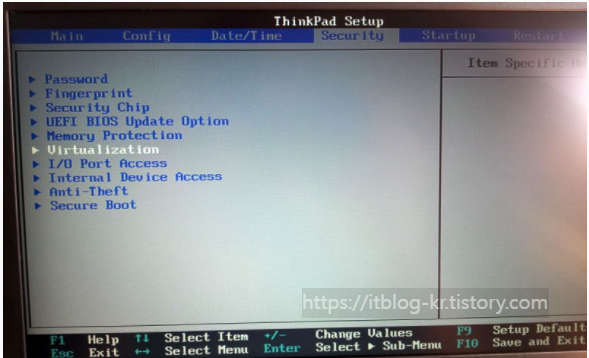
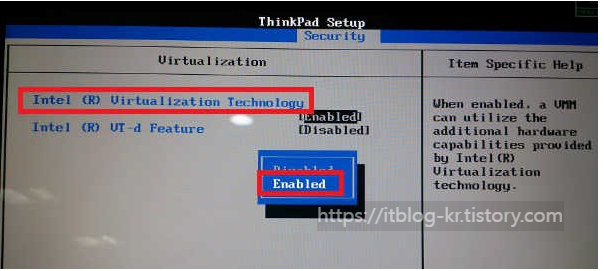
EVE-NG는 하드웨어적으로 가상화가 Enable 되어 있어야지 장비를 구동시켰을 때 제대로 동작을 합니다.
- Intel VT
- AMD-V(SVM)
만약에 이 바이오스에서 가상화 기능이 Disable 되어 있으면 장비 구동 시켰을 때 3초 후에 다시 장비가 꺼지는 증상을 경험할 수 있습니다.
아래 링크를 참조하여 바이오스에서 가상화를 Enable 합니다.
노트북별로 바이오스 접속 하는 방법과 가상화 메뉴가 다 다를 수 있습니다.
https://itblog-kr.tistory.com/2
[EVE-NG #2] 네트워크 시뮬레이션 EVE-NG 설치전 확인사항
안녕하세요. 저번 글에서는 네트워크 시뮬레이션이 대해서 알아보았습니다. 네트워크 시뮬레이션 EVE-NG 설치전 EVE-NG에 대해서 알고 싶으시다면 아래에 링크를 참조후 EVE-NG 설치 하시면 됩니다.
itblog-kr.tistory.com
EVE-NG를 설치하기 전에 가상화 프로그램이 필요합니다.
- VirtualBox(무료)
- VMware Player(무료)
- VMware Workstation(유료)
- Vmware ESXi(무료) - 특정 CPU 소켓 또는 코어수 메모리 제안 - 하드웨어 Full 기능을 다 사용하기 위해서는 라이선스가 필요합니다.
그 외에 다른 가상화 프로그램을 사용하여 EVE-NG를 설치 가능하지만 대부분 위에 프로그램을 사용하여 EVE-NG를 설치하고 네트워크 장비를 공부하고 테스트합니다.
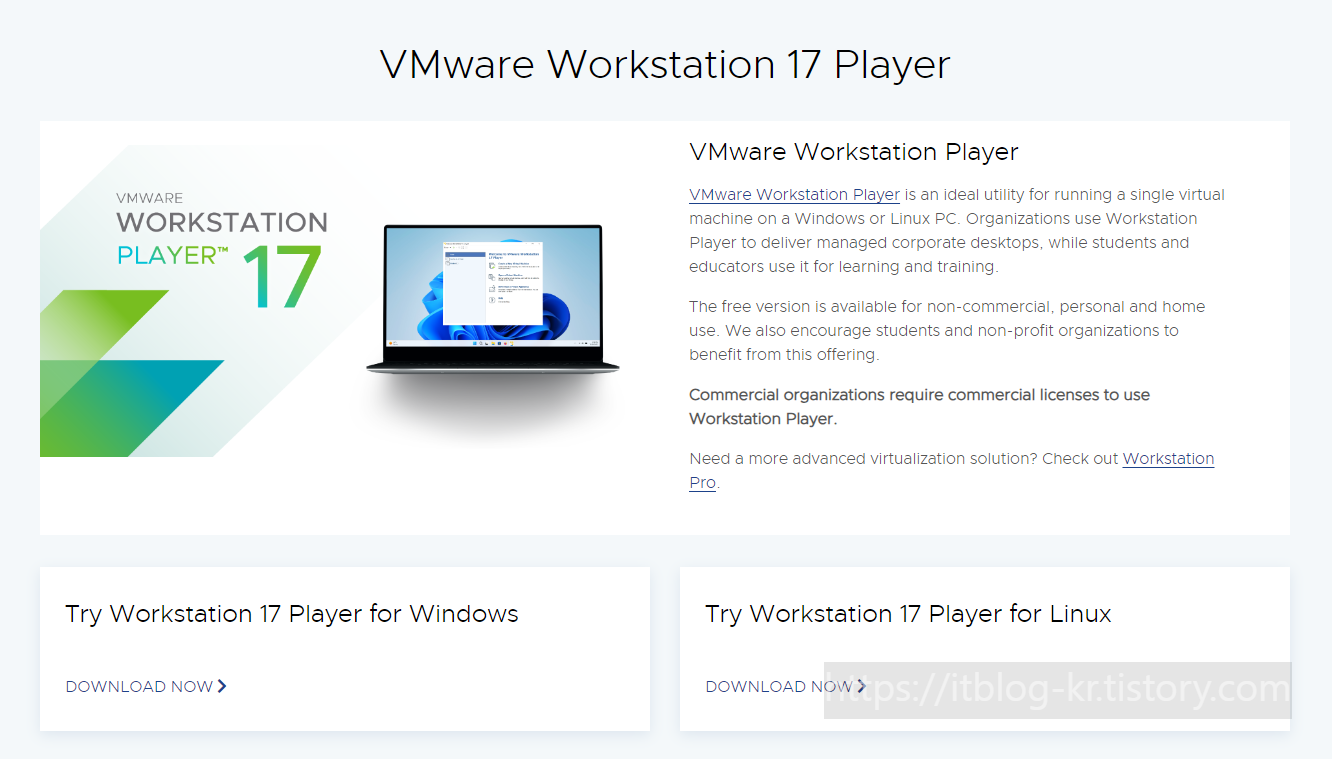
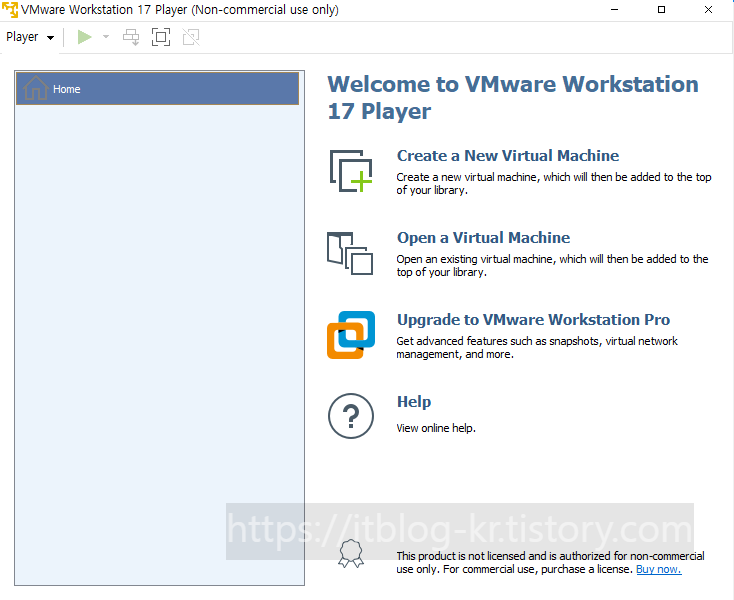
오늘은 VMware Player를 사용하여 EVE-NG를 설치하겠습니다.
VMware Player는 무료이기 때문에 라이선스 없이 사용 가능 합니다.
1. 아래 링크를 접속해서 Vmware Player를 다운로드합니다.
https://www.vmware.com/products/workstation-player/workstation-player-evaluation.html.html
Download VMware Workstation Player | VMware
Download VMware Workstation Player for free today to run a single virtual machine on a Windows or Linux PC, and experience the multi-functional capabilities.
www.vmware.com
1-1 계정이 필요합니다. 계정이 있으시면 로그인하고 다운로드를 하고 계정이 없으신 분은 회원 가입을 하시고 다운로드를 합니다.
1-2 다운로드한 파일을 실행합니다. 그리고 Next버튼을 클릭합니다.
1-3 아래 I accept the terms in the License Agreement 선택하고 Next 버튼을 선택합니다.

1-4 Next버튼을 클릭합니다.

1-5 Next 버튼을 클릭합니다.
1-6 Next 버튼을 클릭합니다.

1-7 Install 버튼을 클릭합니다.

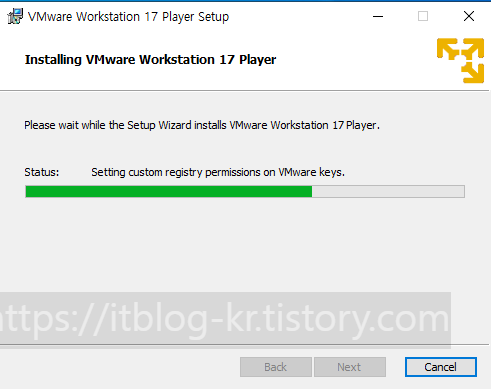
1-8 설치가 완료될 때까지 기다립니다.
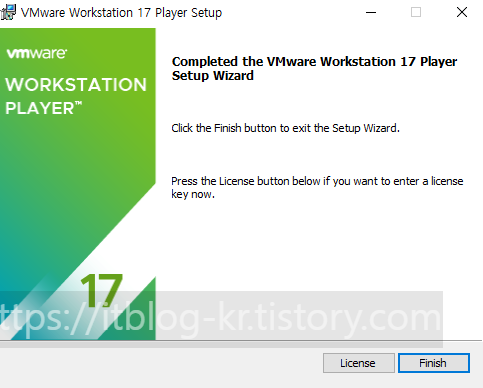
1-9 Finish 버튼을 클릭합니다.
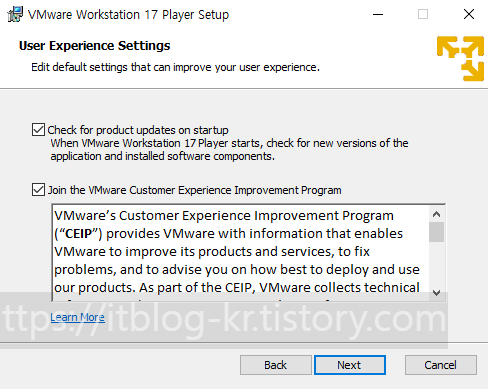
1-10 Use VMware Workation 17 Player for free for non-commercial use 선택하고 Continue 버튼을 클릭합니다..

1-11 Finish 버튼을 클릭합니다.
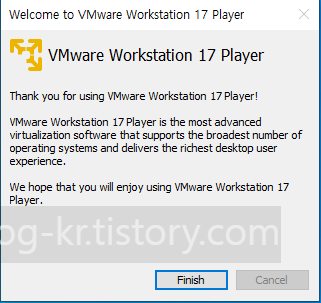
1-12 VMware 17 Player 설치가 완료되었습니다.
2. EVE-NG 공식사이트에 접속하여 EVE-NG를 다운로드합니다.
현재 시점에서는 아래와 같이 2가지 버전을 다운로드할 수 있습니다.
https://www.eve-ng.net/index.php/download/
Download -
Download Links and info for EVE-NG EVE-NG Professional/Learning Center Version 6.2.0-3 This edition requires to buy license. To buy a license please go to our Buy …
www.eve-ng.net
EVE-NG Professional/Learning Center Version 6.2.0-3 (유료 버전)
Free EVE Community Edition Version 6.2.0-2 (무료 버전) - 기능적으로 유료 보전보다는 제한이 없지만 혼자서 공부하는 데에는 지장이 없습니다. 저도 Free 버전을 사용하여 공부 및 프로젝트 테스트하고 있습니다.
유료 버전은 구동형이며 1년 가격은 약 238.91불 현재 환율로 하면 약 33만 원입니다.
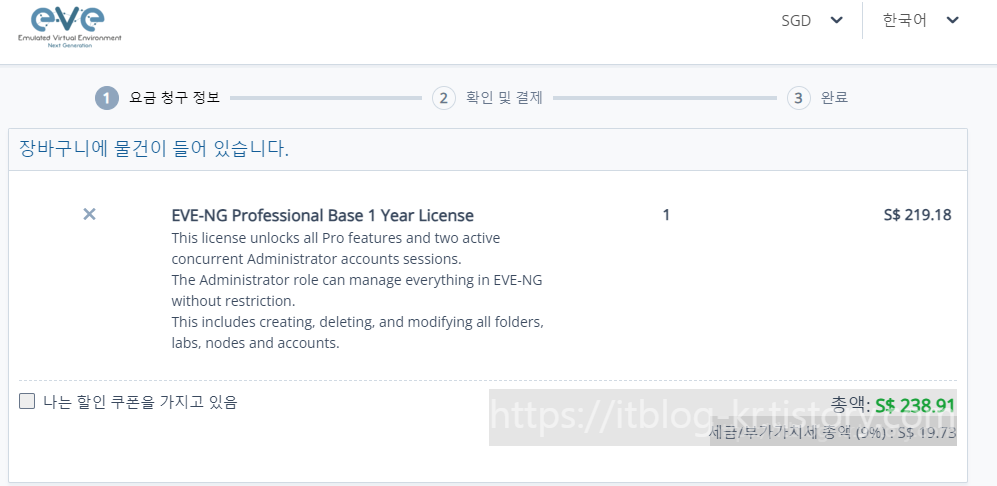
기능에 차이는 아래 표를 참고 부탁드립니다.
| Features/Edition | Community |
Professional | Learning Center | Description |
| Price | Free | 150 EUR w/o VAT | 150 EUR + Added Roles | |
| User’s roles | 2x admin accounts only | 2x admins simultaneous unlimited accounts |
admin, user, editor | Restrictions of the EVE usage, WEB UI, per user based |
| Lock user per folder | User cannot see other EVE folders, only his own | |||
| Lock user edit rights | User cannot edit labs, images etc | |||
| Shared Lab Folder | Shared lab folder visible for all users | |||
| User’s account validity (1/4 Hour accuracy) | Ability to set calendar validity for account, Date and time ( From -> To ) | |||
| Lab Timer | Timer for Lab training | |||
| Running labs folder | User can run more than one lab. Running labs will appear in special running labs folder. Per user based | |||
| Node limit per lab | 63 | 1024 | 1024 | Limit of nodes to run per lab |
| TCP ports | fixed 128 per POD | Dynamic 1-65000 | Dynamic 1-65000 | Automatic TCP port choose for telnet session |
| Local Wireshark capture | Local wrapper using ssh and root password to the EVE | |||
| Local Telnet client | Local wrapper using locally installed telnet client | |||
| Local VNC client | Local wrapper using locally installed vnc client | |||
| Wireshark integrated | Docker integrated wireshark | |||
| Docker container support | Docker container support | |||
| Running nodes interface connections (hot connections) | Hot/live nodes interface connection | |||
| NAT Cloud | Integrated NAT cloud, connect node to the internet. NAT to the EVE management interface DHCP 172.29.129.0/24, gateway .254 | |||
| HTML console without Wireshark capture | HTML console | |||
| HTML console with Wireshark capture | HTML wireshark capture | |||
| HTML Desktop Console | Integrated Docker PC management | |||
| Multi startup configuration choose per lab | Option to create and boot lab from different startup configurations, multi startup config | |||
| Export/Import configs or config packs to local PC | Option import and export single config or config packs to the lab | |||
| EVE user Radius authentication | Multi Radius servers support | |||
| EVE user Active Directory authentication |
Microsoft Active Directory support | |||
| Custom image template, cli based | Option create own image templates. | |||
| EVE Lab chat | Lab chat between EVE lab users. | |||
| Custom MAC address for Qemu nodes | Option to change first interface MAC address for qemu nodes | |||
| Shared Lab |
Shared Lab folder, drop lab for others |
|||
| Shared Project |
Shared Lab one to many, Single Lab allows work a team with single lab. |
|||
| Link Quality, Delay, packet loss, jitter | Feature allows apply link quality functions: packet loss, delay and rate | |||
| Link design feature | Option to change connection colour, style | |||
| Rich integrated text editor | Rich HTML text editor for text and objects management in the lab. | |||
| Advanced Lab design objects | Round square, lines, arrowed lines, style and colour | |||
| Admin user option to join in other user lab | Admin user can join to the other user lab in the parallel session | |||
| Admin user option to open parallel console session to other user node | Admin user can open parallel console session to other user node | |||
| Running labs and nodes management | Admin can manage other user running labs and nodes. Join or stop labs or nodes. | |||
| EVE Cook Book | EVE Professional or Community Cook Book | |||
| Info about HDD/labs use per user, User infoweb GUI | Information about user HDD resource use | |||
| User quota (limit cpu/ram per user) | Limit cpu/ram per user. User profile EVE resource usage limitation. |
|||
| Serial interface capture (IOL only) |
HDLC/PPP/Frame Relay support for serial’s links | |||
| Link state and suspend / resume | Link state support for Qemu, IOL, Dockers | |||
| Dark Mode | Switch Lab view mode to Dark or Light mode |
|||
| Lab Task management | Option to add offline pdf or online document into lab Task |
|||
| EVE Cluster | Multi servers EVE system | |||
| EVE Backup Manager | Full Backup and Restore from Backup Solution |
2-1 EVE-NG Community 버전을 다운로드합니다.
예전에는 OVF 또는 OVA로 제공되었으나 현재는 ISO파일로 제공됩니다.
아래 링크처럼 MEGA Mirror 또는 Direct Link를 통하여 다운로드합니다.

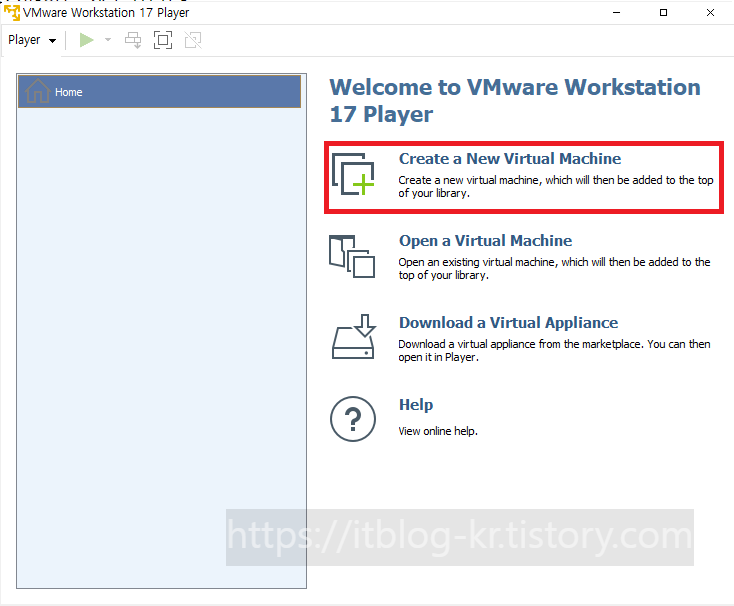
2-2 VMware Player 17을 실행합니다. 그리고 Create a New Virtual Machine를 선택합니다.
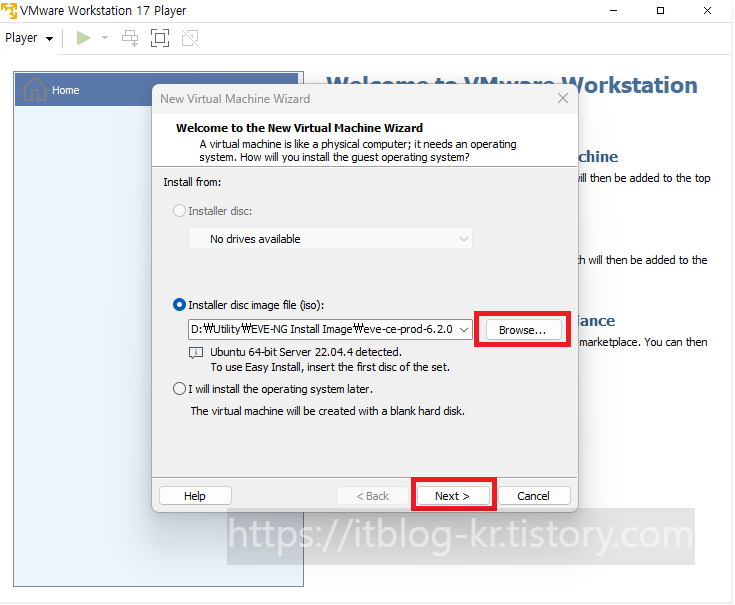
2-3 Browser버튼을 클릭하고 EVE-NG ISO파일을 선택합니다. 그리고 Next 버튼을 클릭합니다.
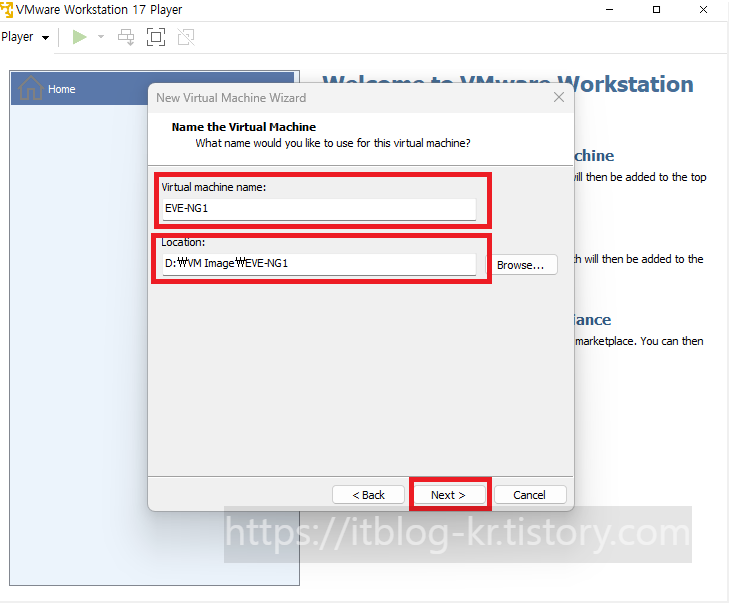
2-4 아래 정보를 입력하고 Next 버튼을 클릭합니다.
Virtual Machine Name:
Location:
2-5 Disk 용량을 60G 선택하고 Next버튼을 클릭합니다. 용량이 많으면 많을수록 좋습니다.
이유는 나중에 테스트하고자 하는 벤더 Image를 EVE-NG에 업로드할 때 용량이 부족하면 업로드가 불가능합니다.

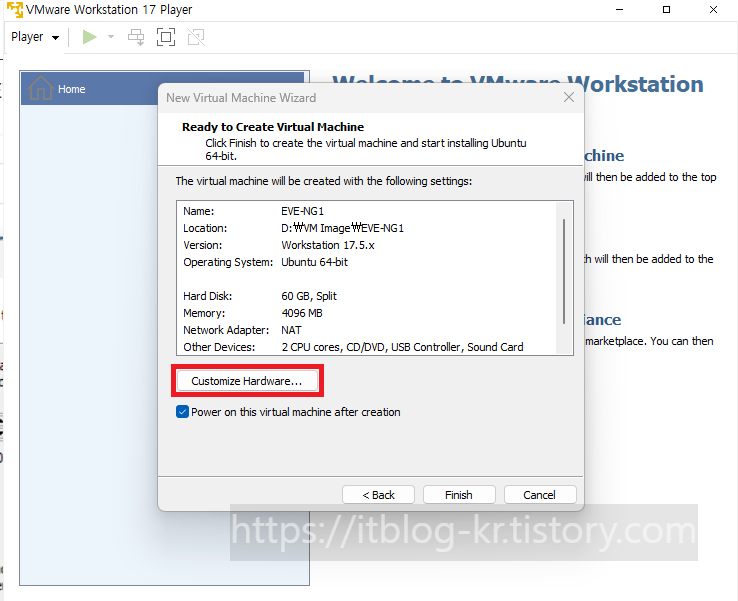
2-6 Customize Hardware를 클릭합니다.
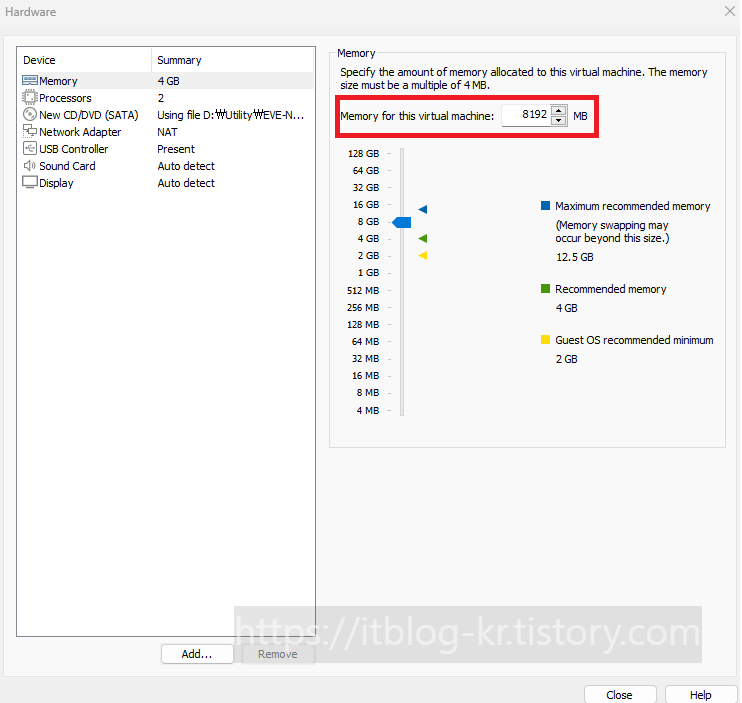
2-7 내 노트북은 16G이고 메모리는 8G를 선택했습니다.
메모리는 많으면 많을수록 좋습니다. 테스트하고자 하는 이미지가 요구하는 메모리 사항 때문에, 메모리가 부족하면 이미지가 동작을 하지 않습니다.
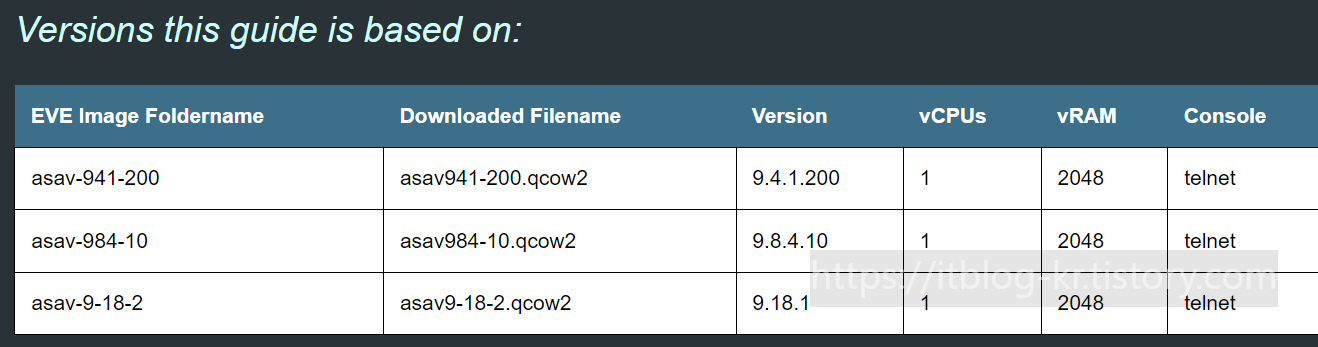
예를 들어 vASA를 테스트하고 싶다면 아래 사진처럼 메모리는 2G가 필요합니다.
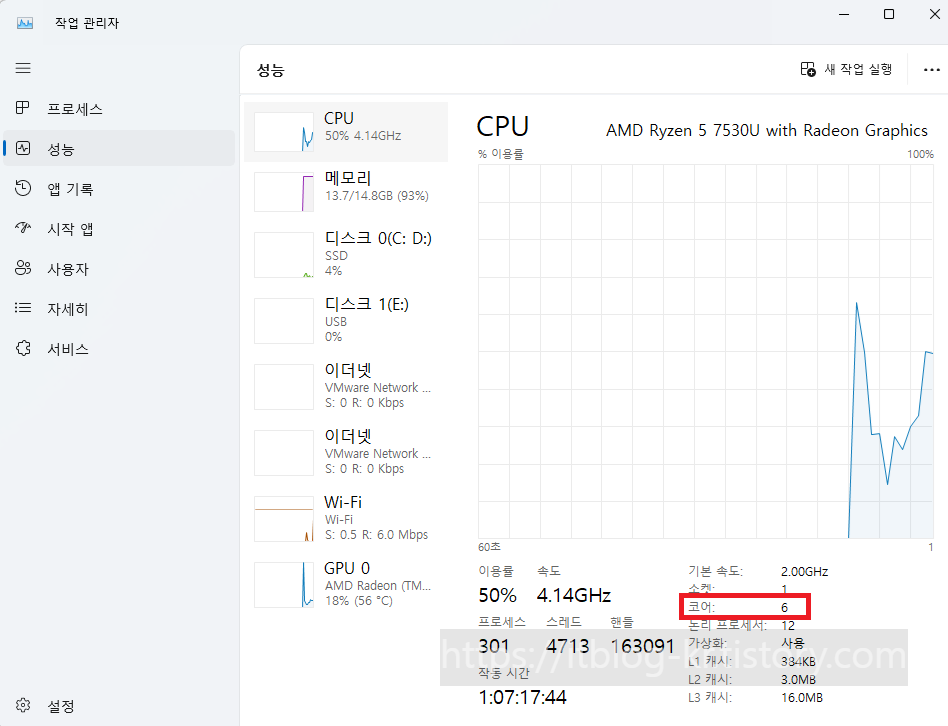
2-8 노트북 CPU에 Cores 수를 확인하고 숫자를 선택합니다.
그리고 아래 Virtualze Inter VT-x/EPT or AMV-V/RVI를 선택합니다.

작업 관리자 -> 성능 -> CPU를 선택하시면 아래처럼 현재 CPU에 코어수를 확인할 수 있습니다.
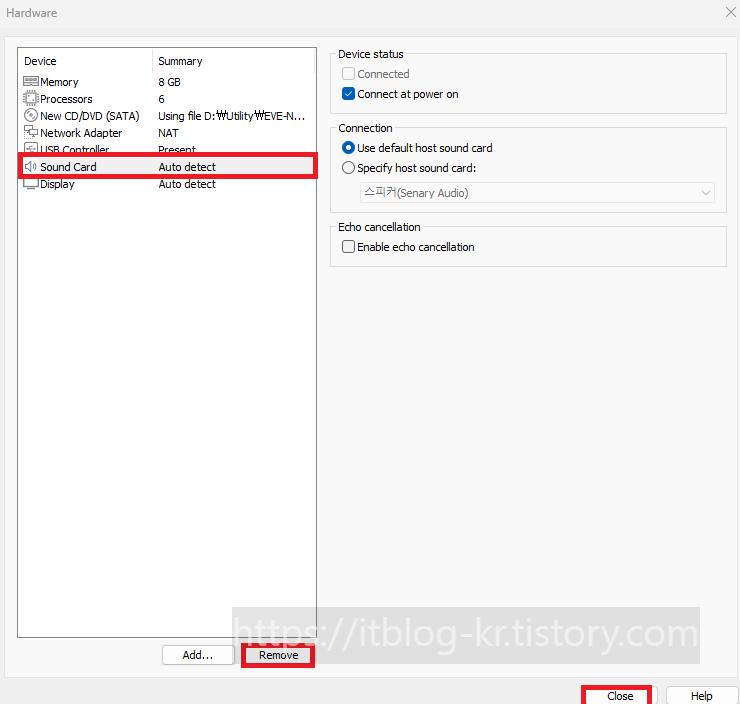
2-9 Sound Card는 필요 없어서 선택하고 Delete 버튼을 선택합니다.
그리고 Close 버튼을 클릭합니다.
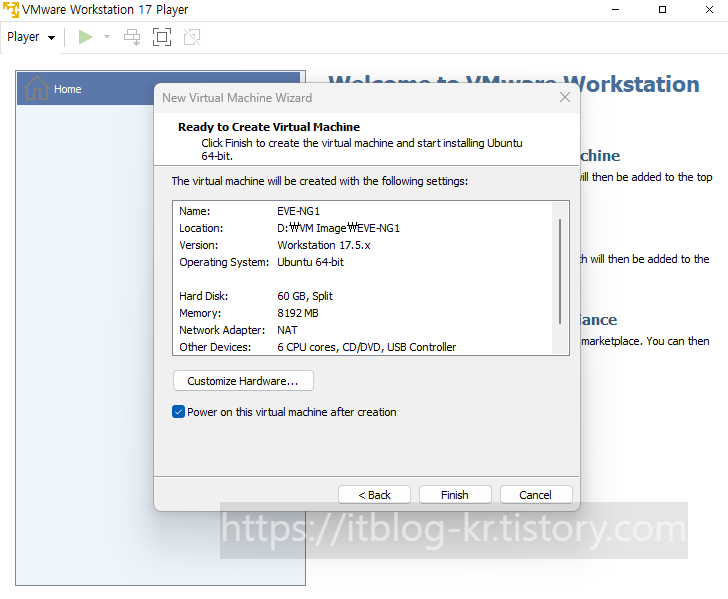
2-10 Finish 버튼을 클릭합니다.
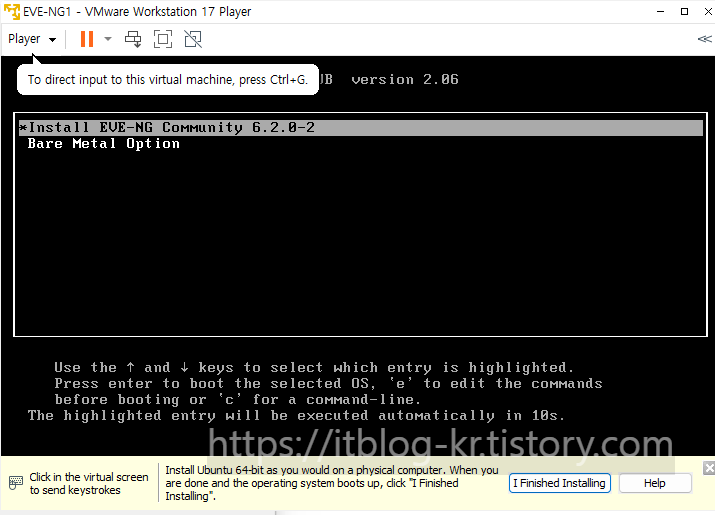
2-11 Install EVE-NG Community 6.2.0-2를 선택합니다.
2-12 설치가 진행됩니다.

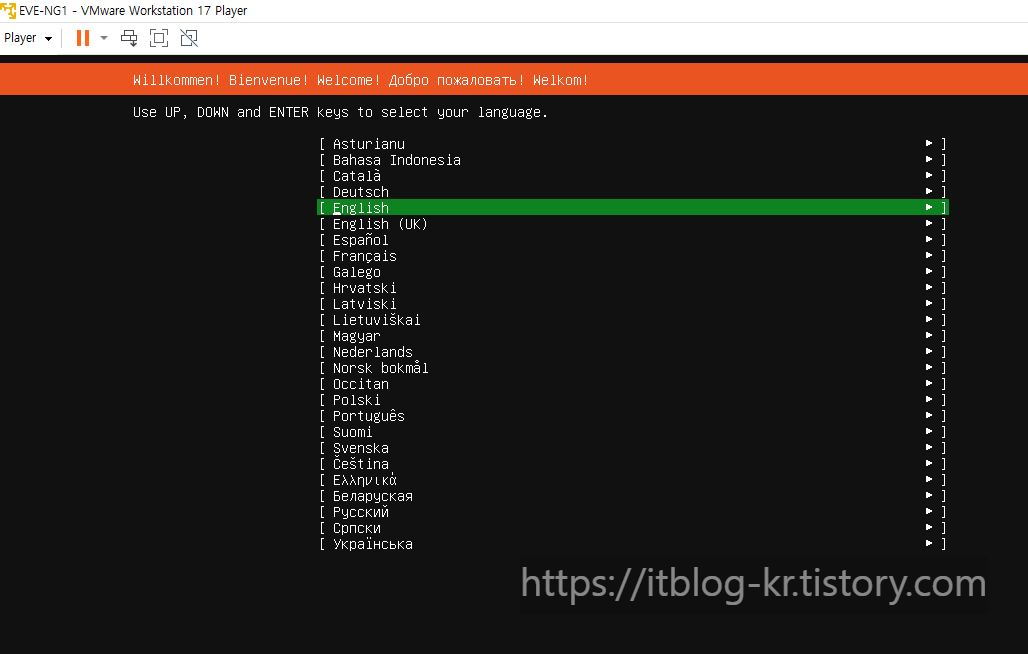
2-13 English를 선택합니다.
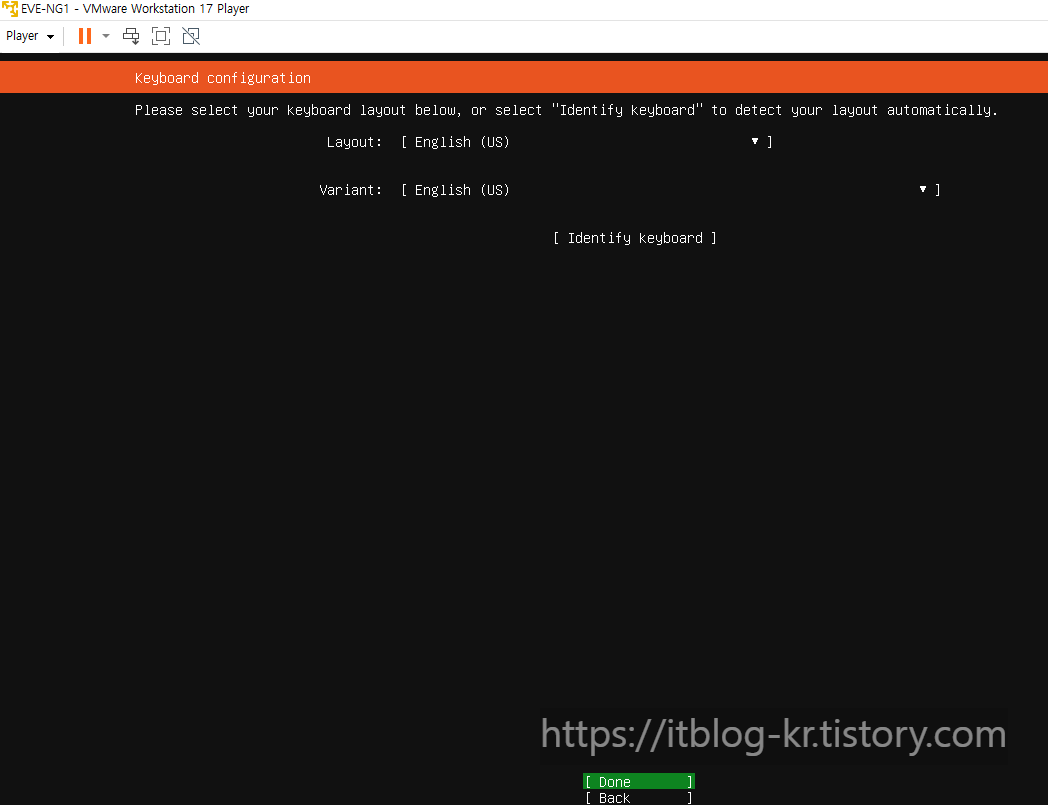
2-14 Done를 선택합니다.
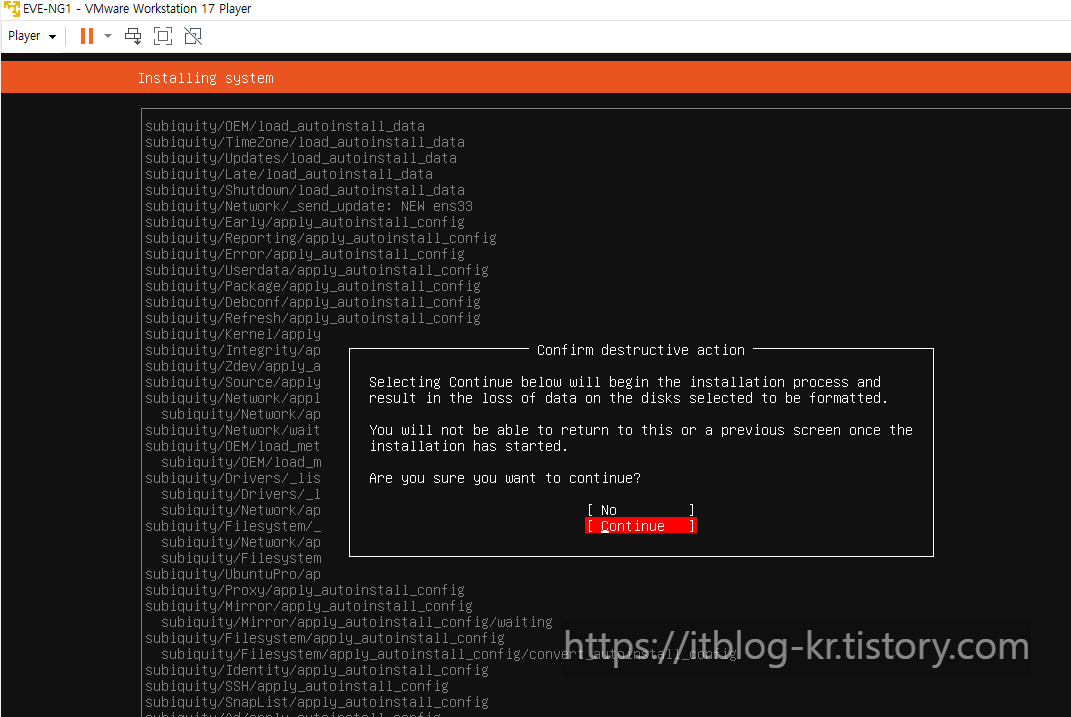
2-15 Continue 버튼을 선택합니다.
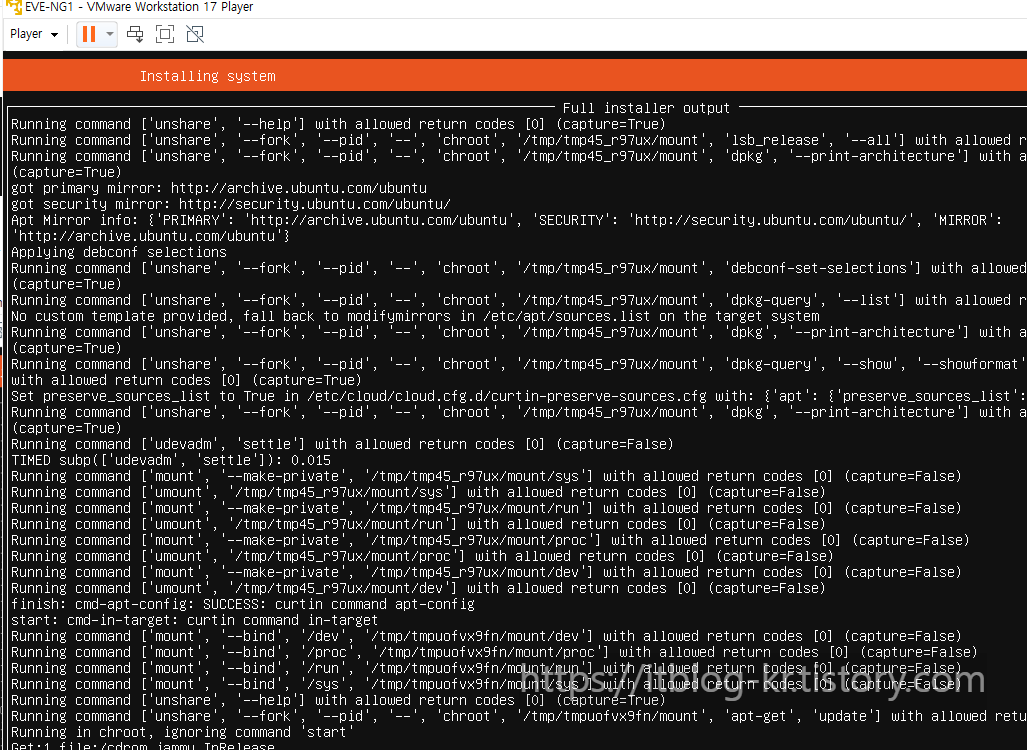
2-16 설치가 완료될 때까지 기다립니다.
2-17 설치가 완료되면 자동으로 재부팅이 됩니다.
그리고 Second Stage install in progress....
두 번째 설치가 진행됩니다.
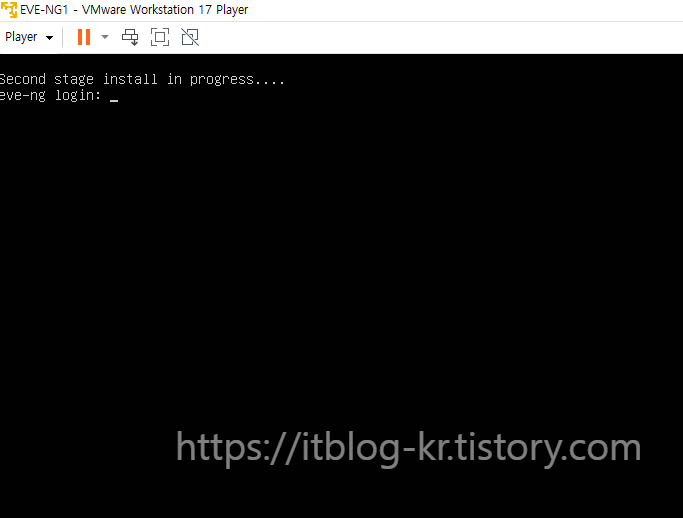
2-18 두 번째 설치가 완료되면 자동으로 재부팅이 됩니다.
CLI 모드에서 기본 로그인 정보는 아래와 같습니다.
ID: root
Password: eve

2-19 password를 입력합니다.
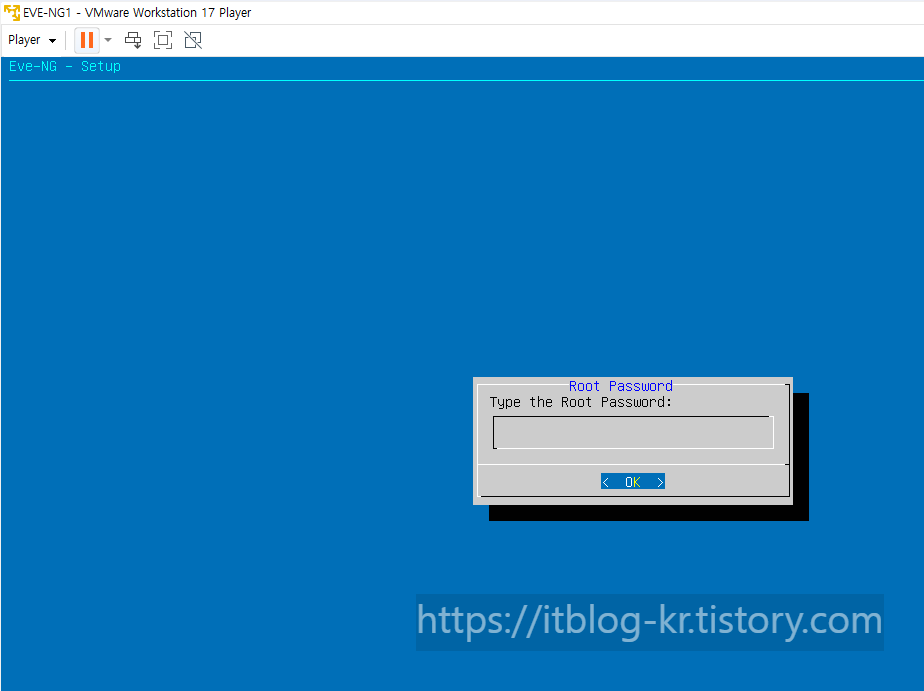
2-20 password를 다시 입력합니다.

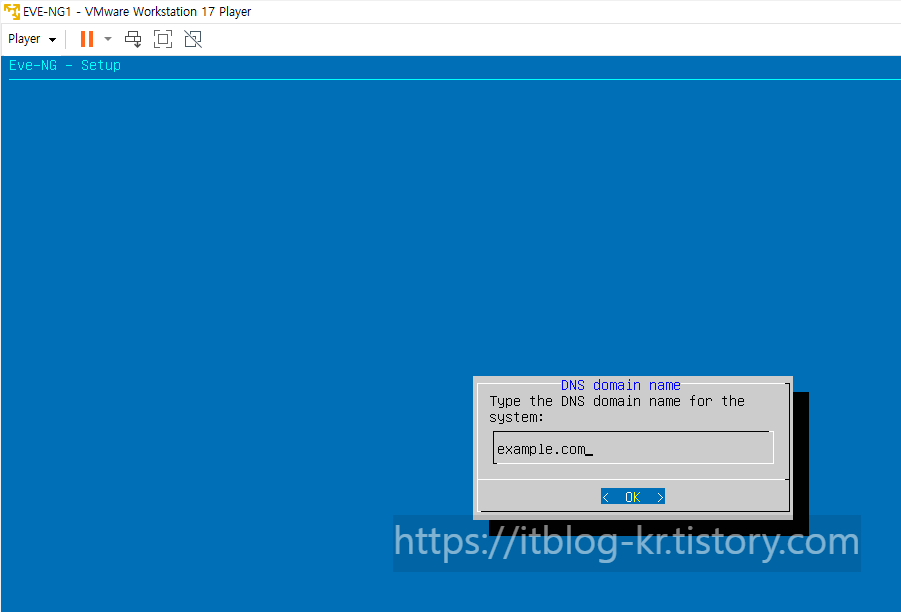
2-21 hostname를 입력합니다. 디폴트값으로 eve-ng를 선택합니다.

2-22 domain name를 입력합니다. 디폴트값을 사용하겠습니다.
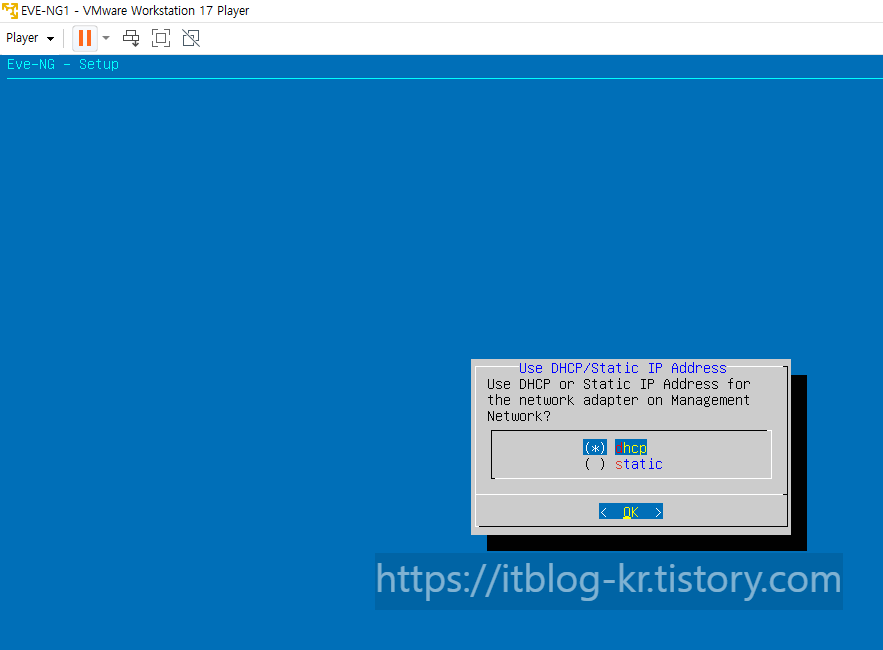
2-23 dhcp를 선택합니다.
VMware Player 자체가 DHCP기능과 NAT기능을 수행합니다.
이 관련 부분은 나중에 따로 강좌를 만들겠습니다.
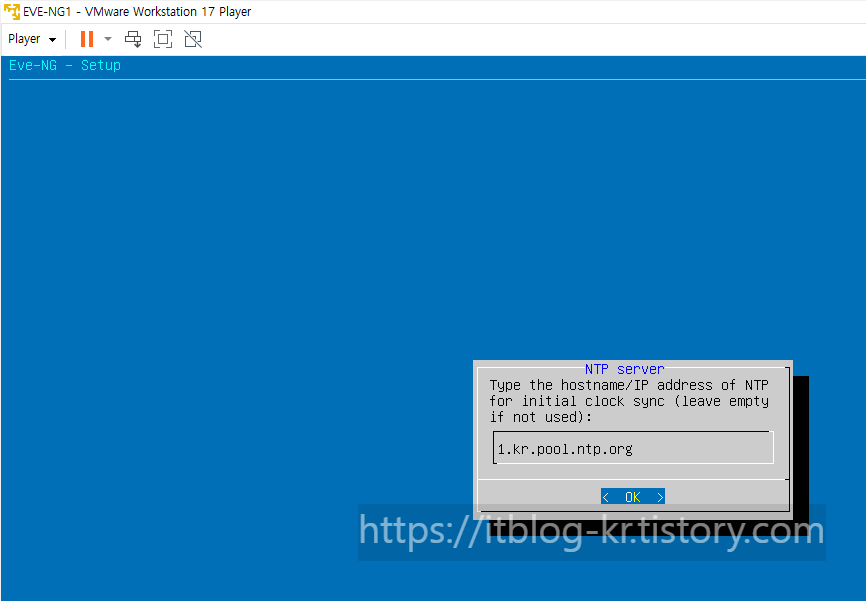
2-24 NTP서버 IP주소를 입력합니다.
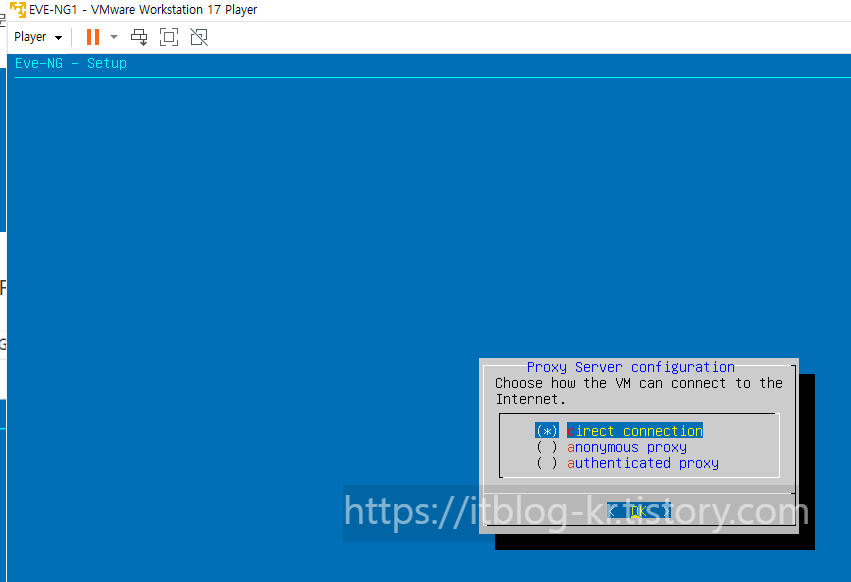
2-25 direct connection를 선택하고 ok버튼을 클릭합니다.
2-26 자동으로 재부팅이 되고 아래처럼 IP주소를 VMware Player 통해서 할당받았습니다.

3 EVE-NG가 제대로 동작하는지 확인합니다.
http://192.168.40.131
3-1 로그인 정보는 아래와 같습니다.
ID: admin
Password: eve
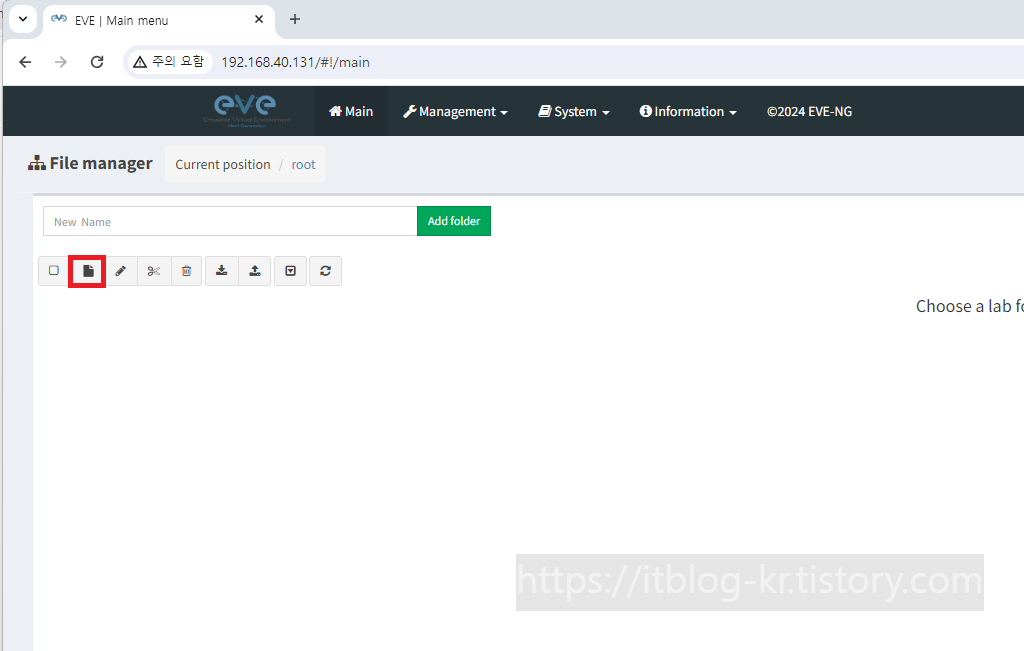
3-2 테스트를 위해서 아래 빨간 생 add new tab를 선택합니다.
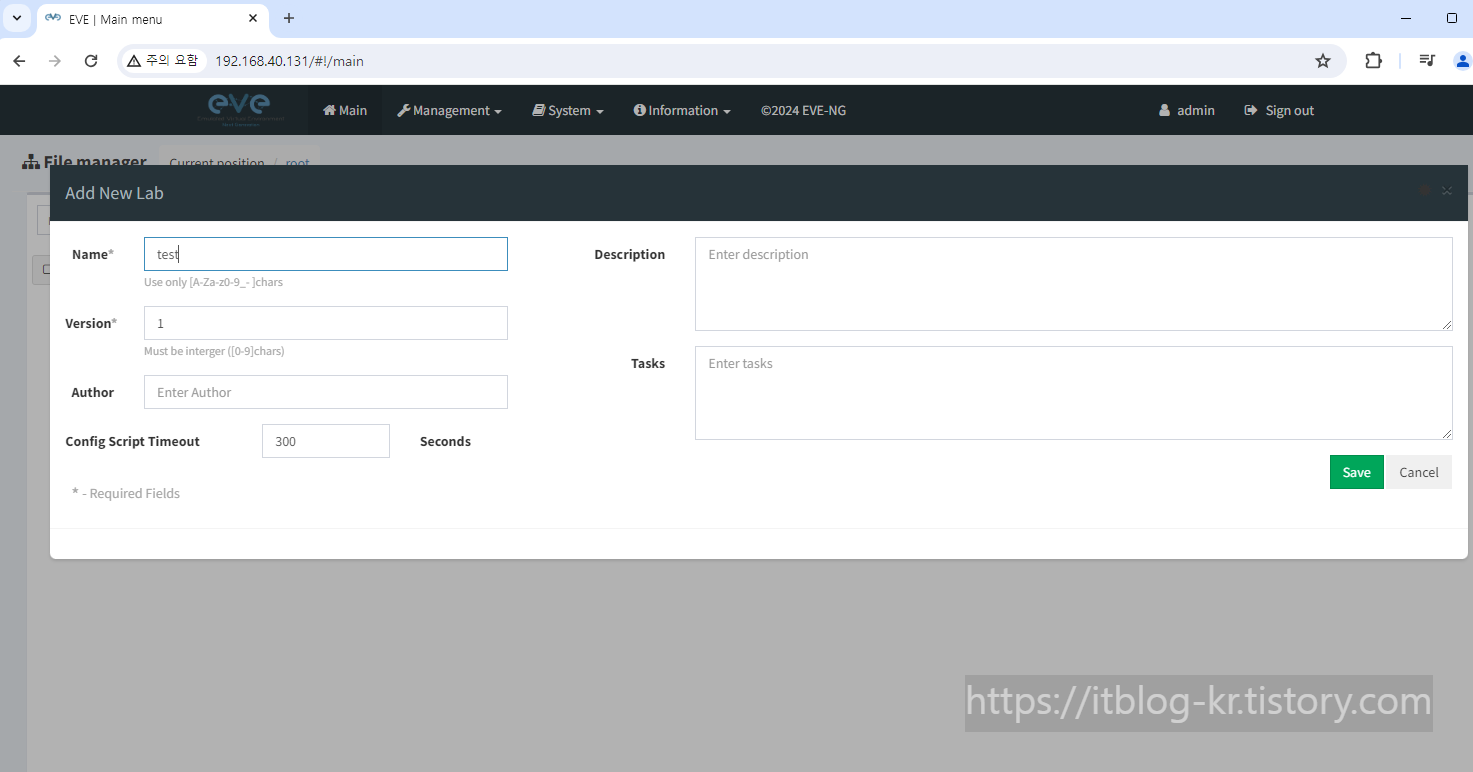
3-3 이름을 정하고 Save버튼을 클릭합니다.
Name: test
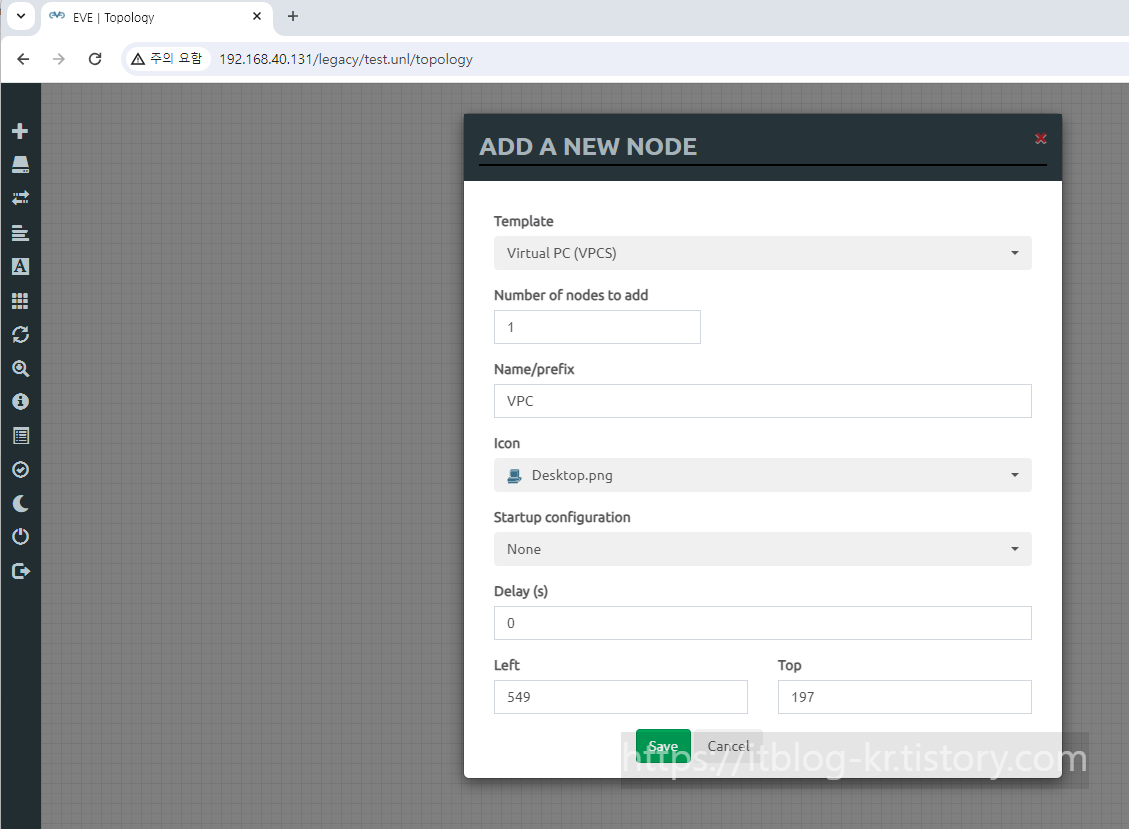
3-4 오른쪽 마우스를 클릭 후 Node를 선택합니다.

3-5 Template에 virtual PC(VPCS)를 선택하고 icon은 Desktop를 선택합니다.
그리고 save버튼을 클릭합니다.
3-6 아이콘을 선택 후 오른쪽 마우스를 클릭합니다.
Start버튼을 클릭합니다.
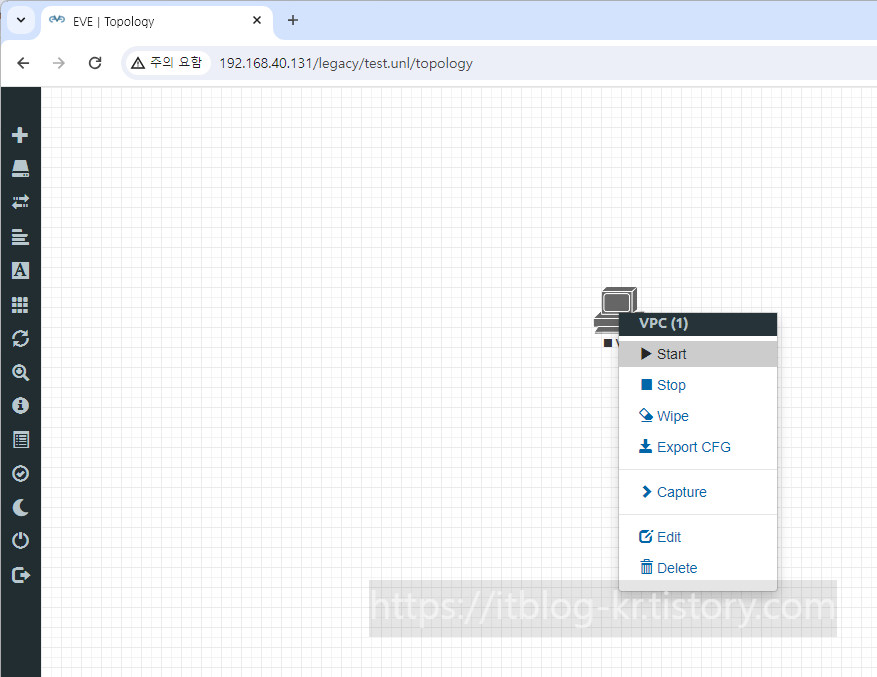
3-7 아래 아이콘이 파란색으로 바뀌었습니다.
30초가 지나도 똑같은 색이면 정상적으로 동작하는 것입니다.
아이콘을 클릭해도 아무런 반응이 없습니다.
EVE-NG Client Pack를 설치를 하면 putty를 통해서 설정이 가능합니다.
이 부분은 나중에 다른 강좌에서 진행하겠습니다.

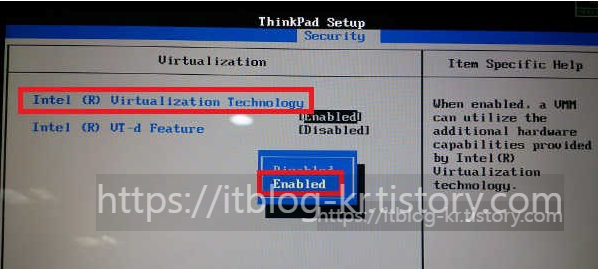
만약에 이미지가 부팅 후 3초 후에 다시 꺼지면서 회색으로 변하면 아래 3가지를 확인하시길 바랍니다.
1. 바이오스에서 Virtualization를 Enable 했는지 확인합니다
2. EVE-NG VM 생성 시 CPU항목에서 아래 항목을 선택했는지 확인합니다.
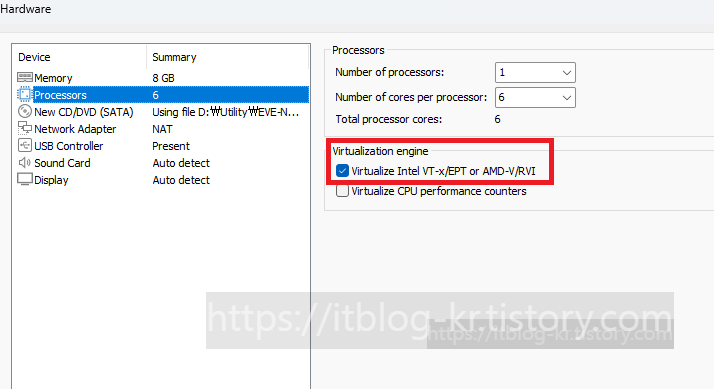
앞으로 많은 강좌를 올릴 예정입니다.
[2024][EVE-NG #2] 네트워크 시뮬레이션 EVE-NG 설치하기(VMware Player)를 읽어주셔서 감사합니다.
'EVE-NG' 카테고리의 다른 글
| [2024][EVE-NG #4] 네트워크 시뮬레이션 EVE-NG 설치하기(VMware ESXi) (0) | 2024.06.28 |
|---|---|
| [2024][EVE-NG #3] 네트워크 시뮬레이션 EVE-NG 설치하기(Virtual-Box) (0) | 2024.06.27 |
| [2024][EVE-NG #1] 네트워크 시뮬레이션 EVE-NG 설치하기(VMware Workstation) (0) | 2024.06.25 |
| [EVE-NG #9] secure crt 설치후 EVE-NG연동 (0) | 2020.11.30 |
| [EVE-NG #8] vIOS cisco 스위치 설치하기 (2) | 2020.11.29 |