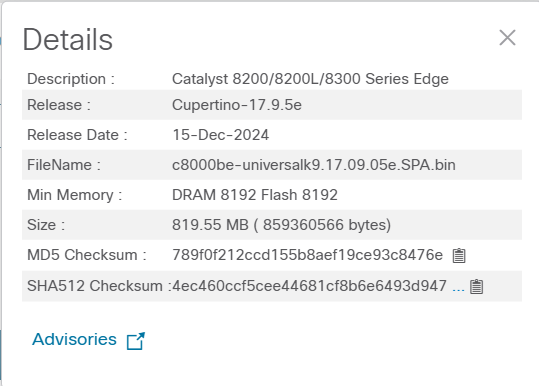
안녕하세요.
오늘은 C9800 WLC DHCP에 대해서 알아보겠습니다.
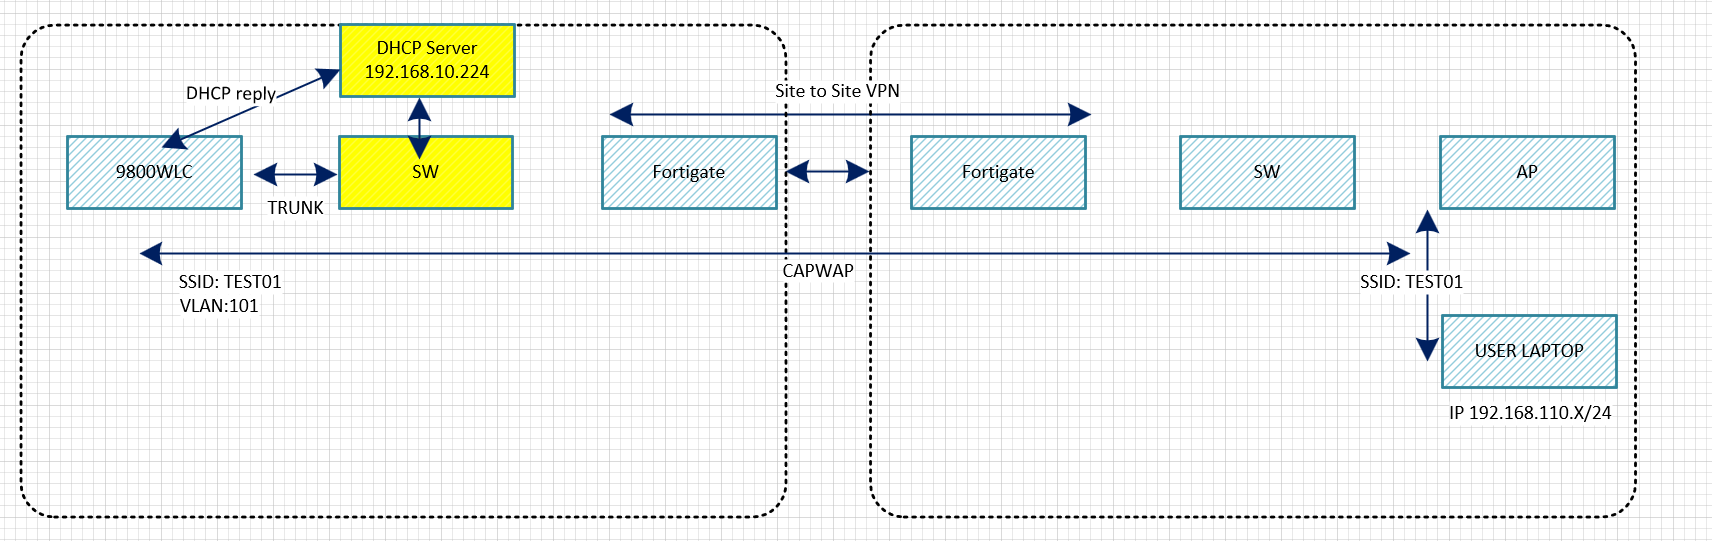
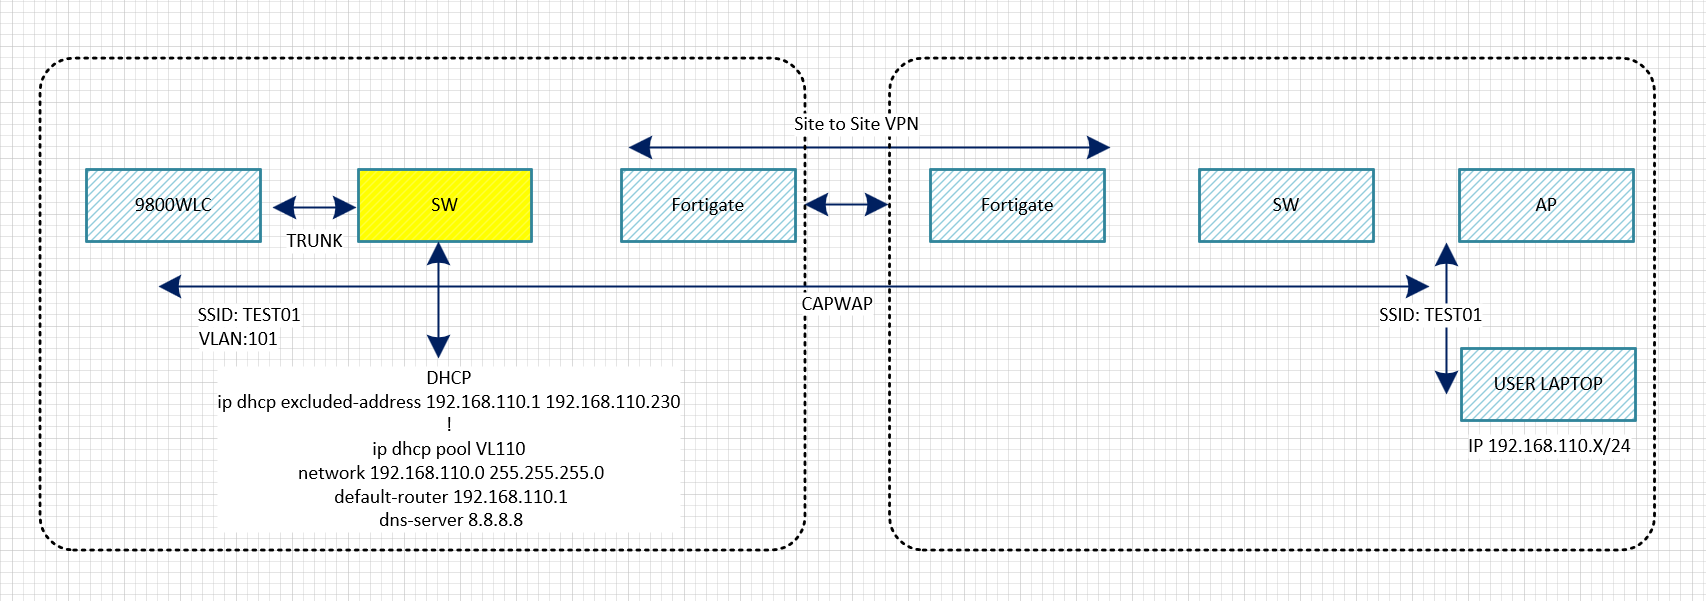
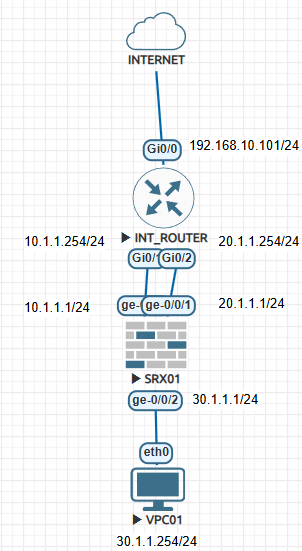
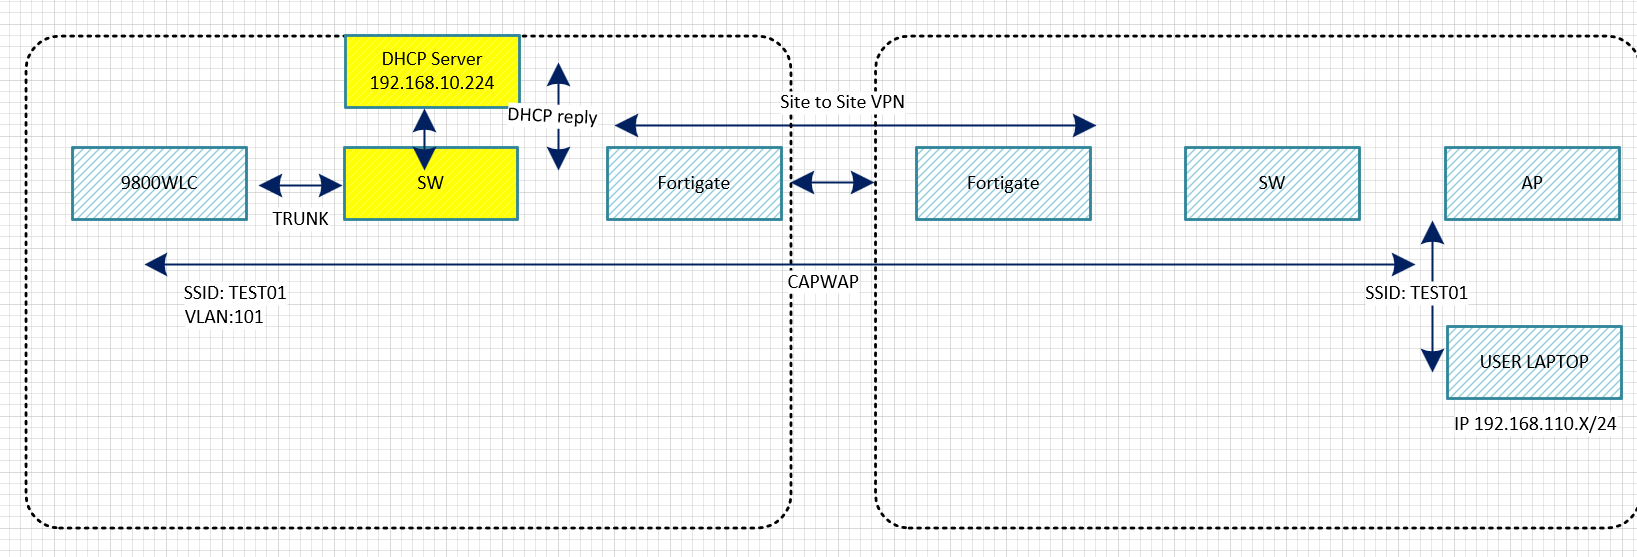
토폴로지
DC에 9800WLC가 있습니다.
1. SSID: TEST01
2. TEST01 VLAN110
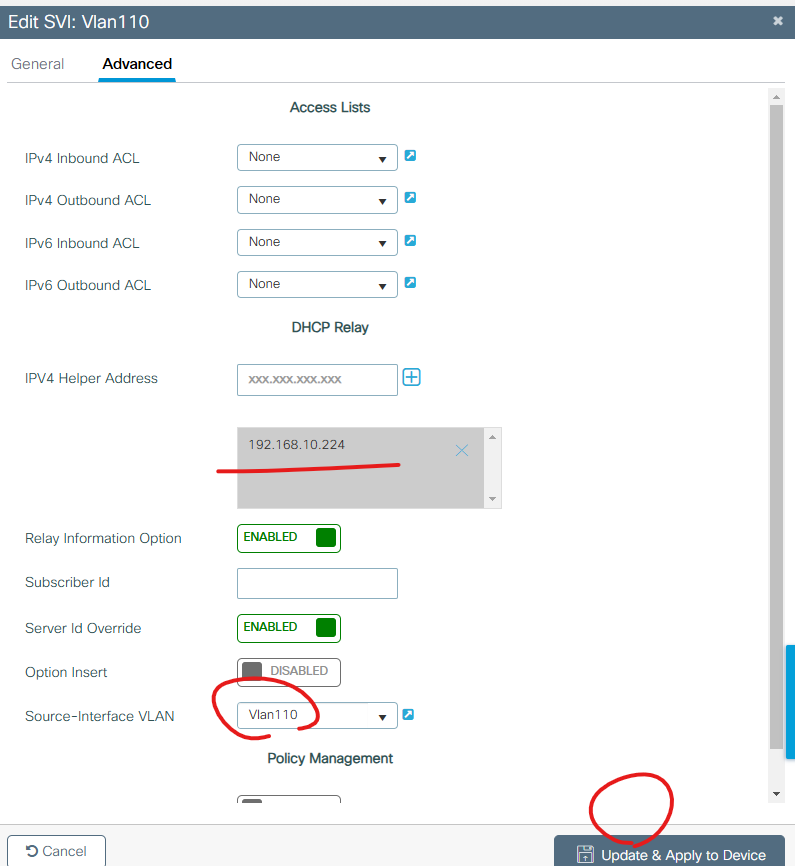
3. DC 백본 스위치에서 INT VLAN110 - DHCP Rely설정
4. WINDOWS 서버 IP주소 192.168.10.224
Office에서 유저가 TEST01 - AP에 접속 합니다.
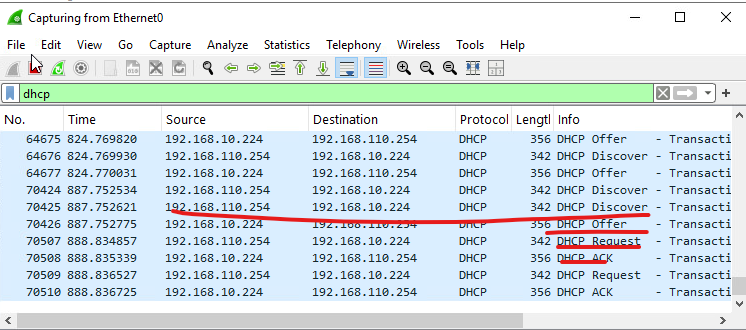
유저 노트북에서 DC에 있는 백본 스위치에서 IP주소를 받습니다.
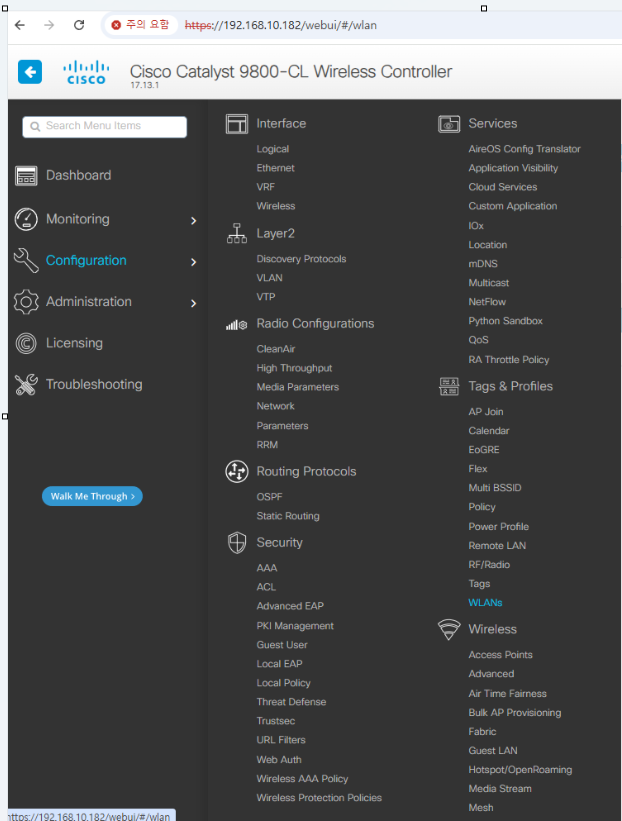
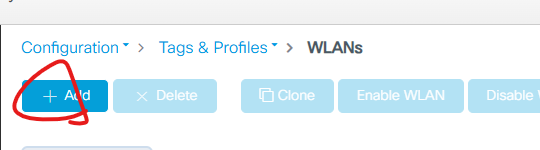
1. WLC VLAN110 설정
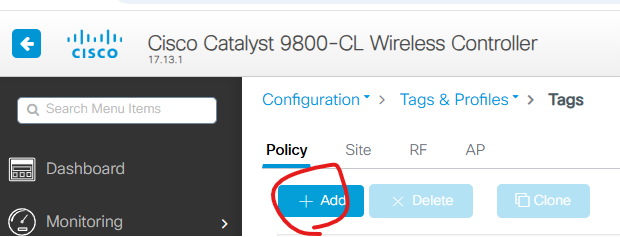
Configuration ->Tags & Profiles -> WLANs

2. Click Add버튼

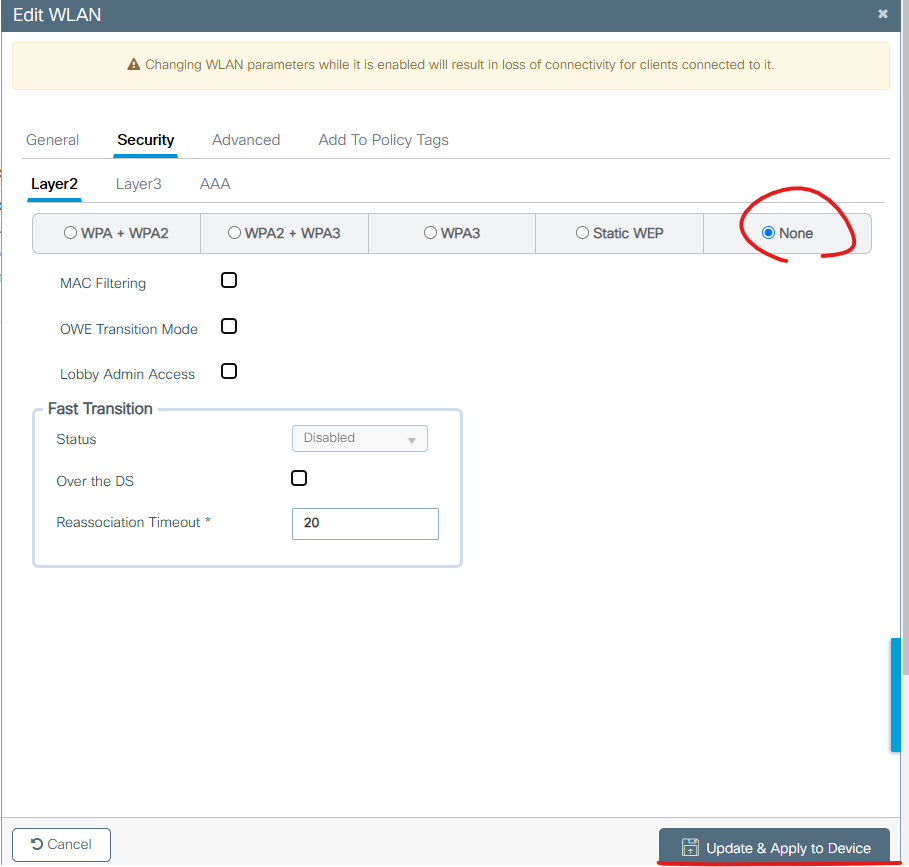
3. 아래처럼 설정 합니다.
Profile Name: TEST01
Status: Enable
Broadcase SSID: Enable
6GHz: Disabled

Security -> Layter2 -> None를 설정해서 SSID 패스워드 없이 접속 가능 하게 합니다.
테스트 용도이기 때문에 이렇게 설정합니다.
그리고 Save버튼을 클릭 합니다.

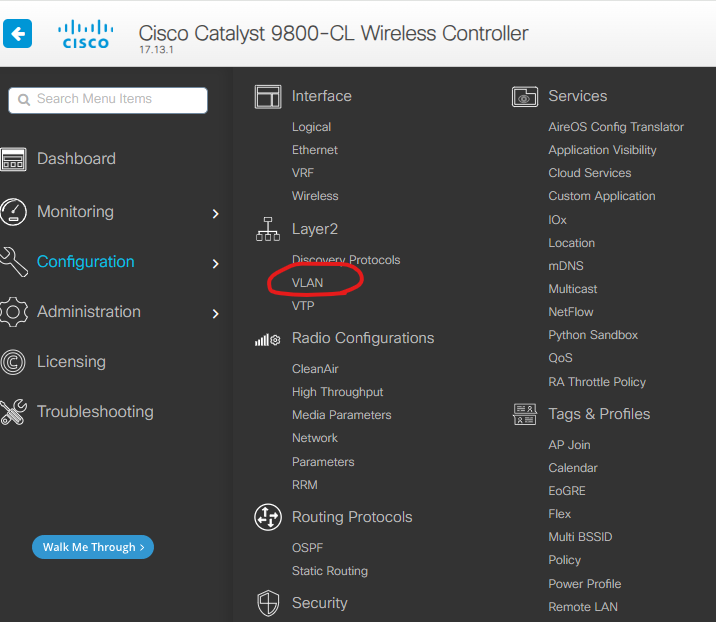
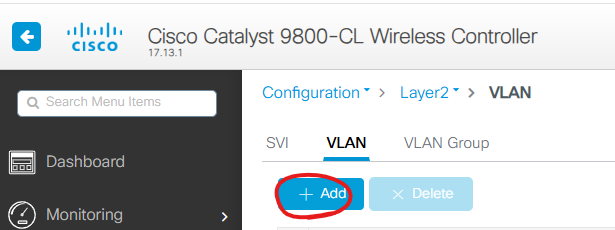
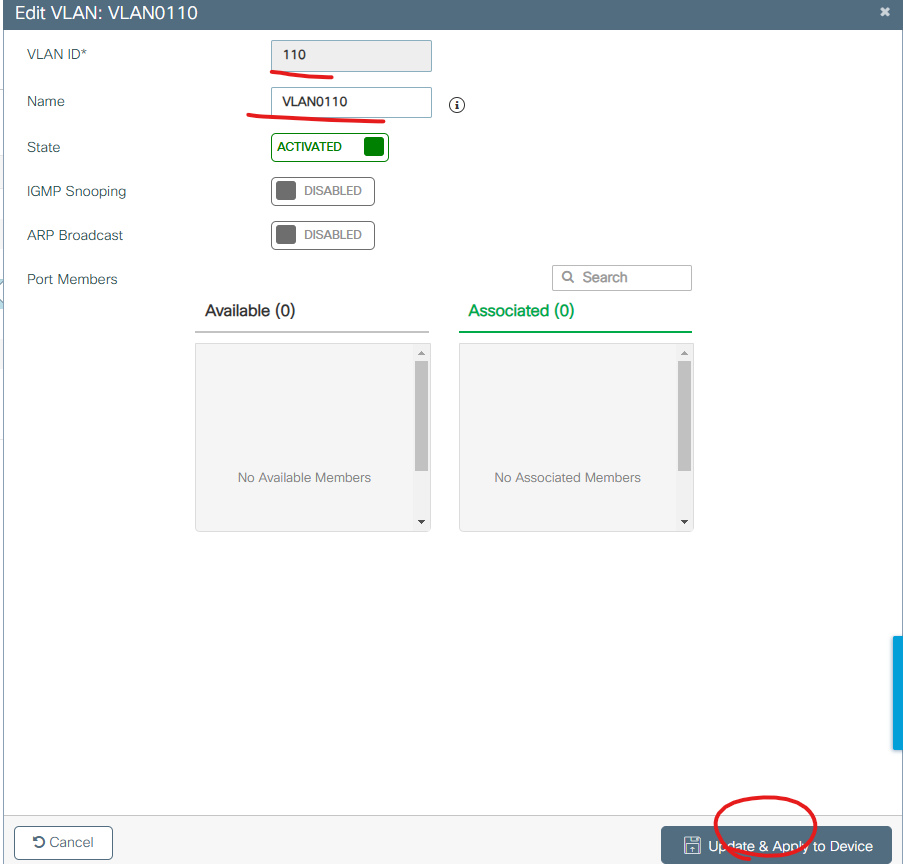
4. VLAN 설정
Configuration -> Layer2 -> VLAN

Add버튼을 클릭 합니다.


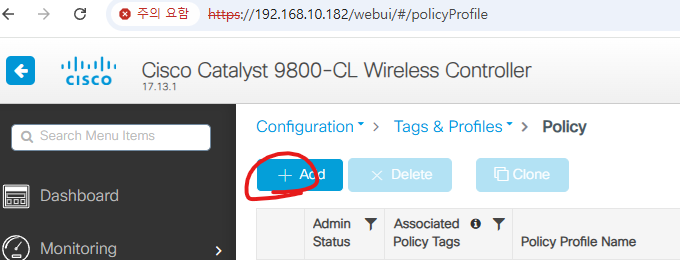
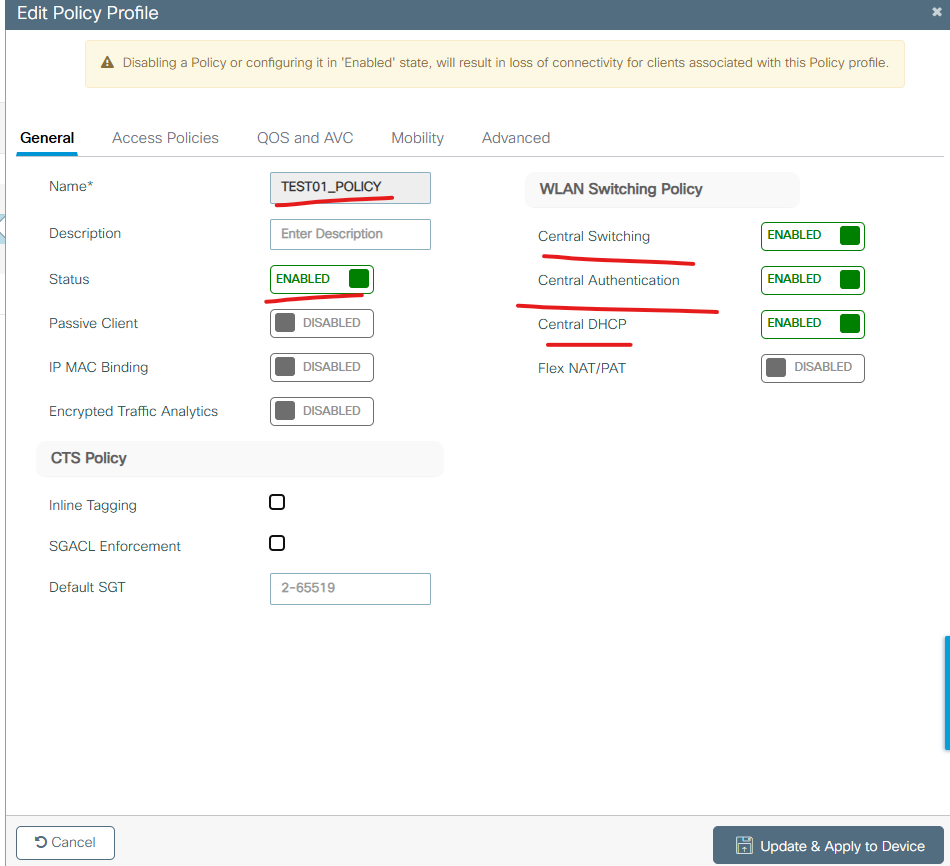
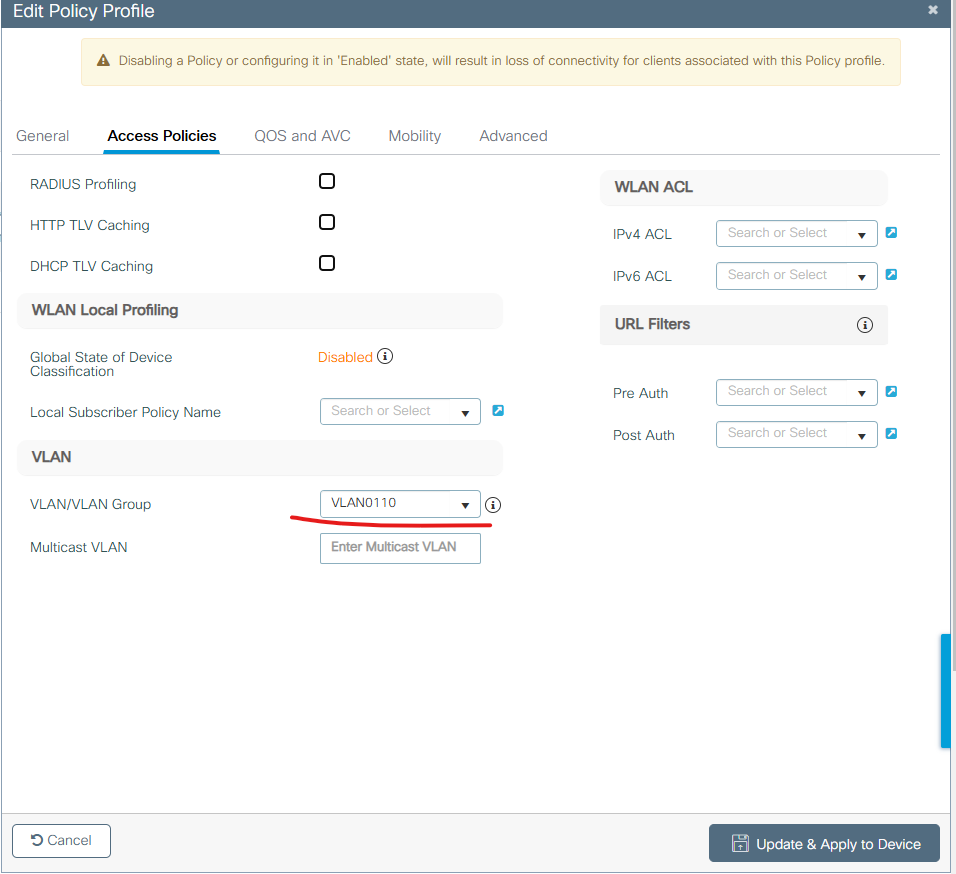
4. Policy 설정

아래처럼 설정합니다.

아래처럼 VLAN를 설정하고 나머지를 디폴트 값으로 두고 SAVE버튼을 클릭 합니다.

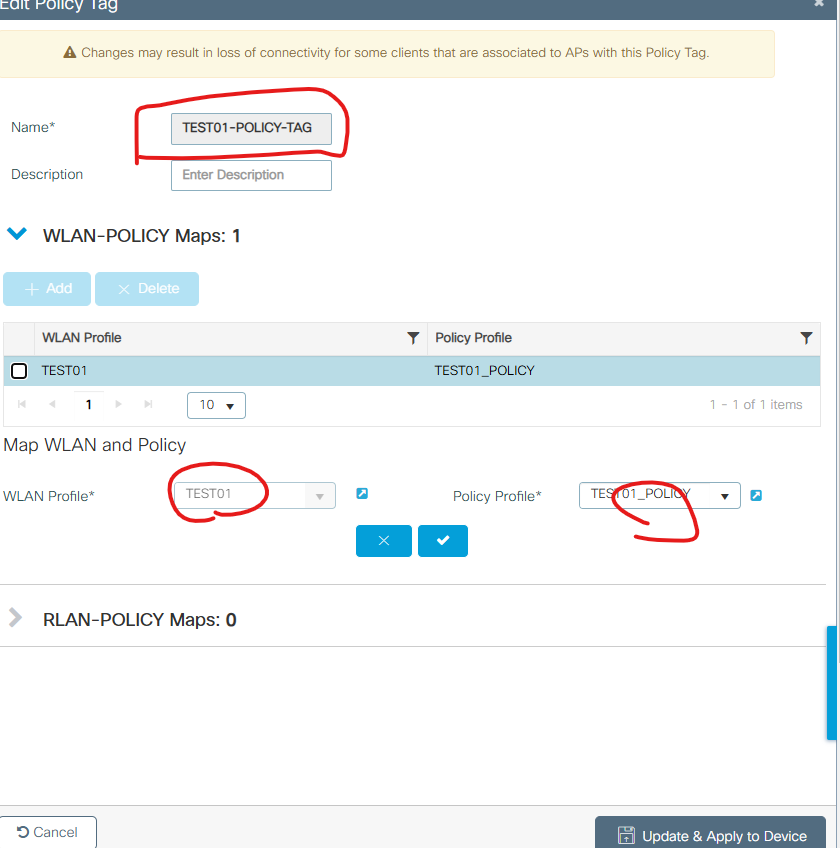
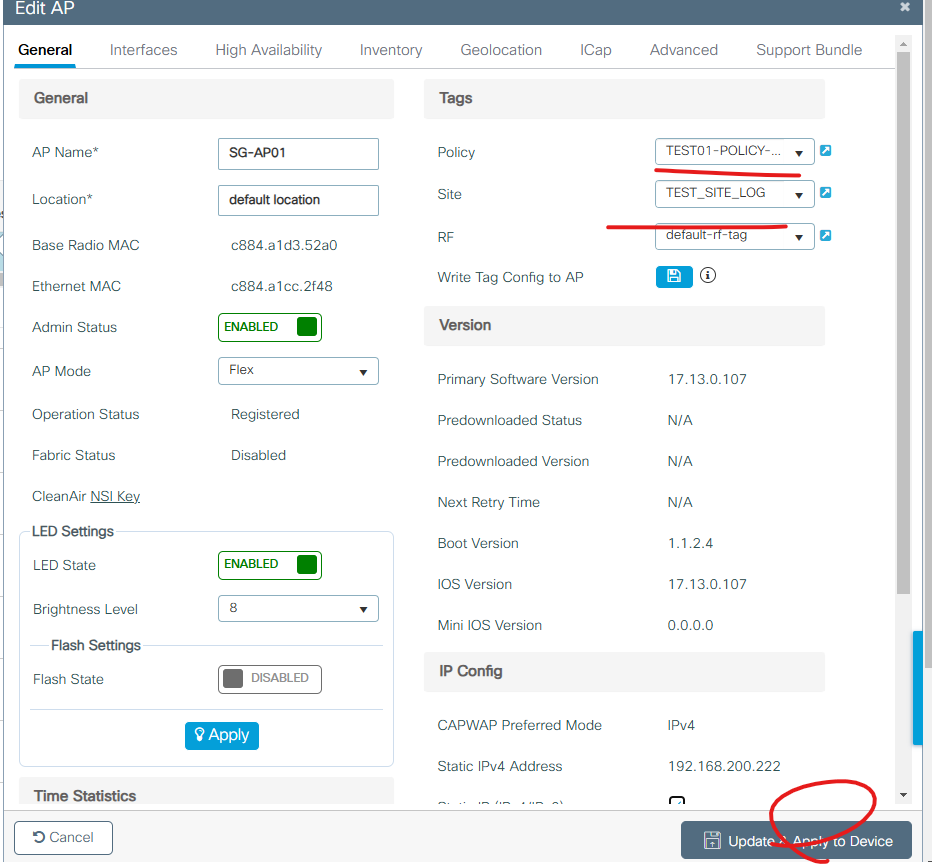
5. TAG설정 - POLICY

Name: TEST01-POLICY-TAG
WLAN: TEST01
PLOICY: TEST01_POLICY

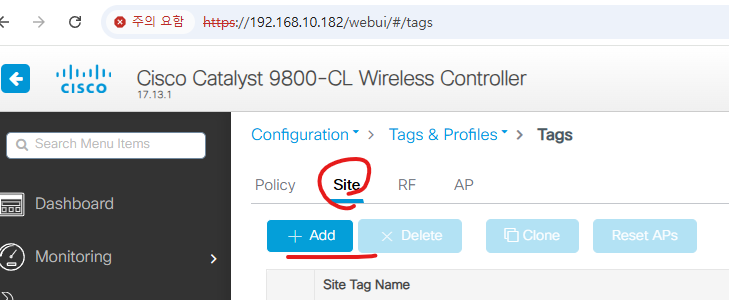
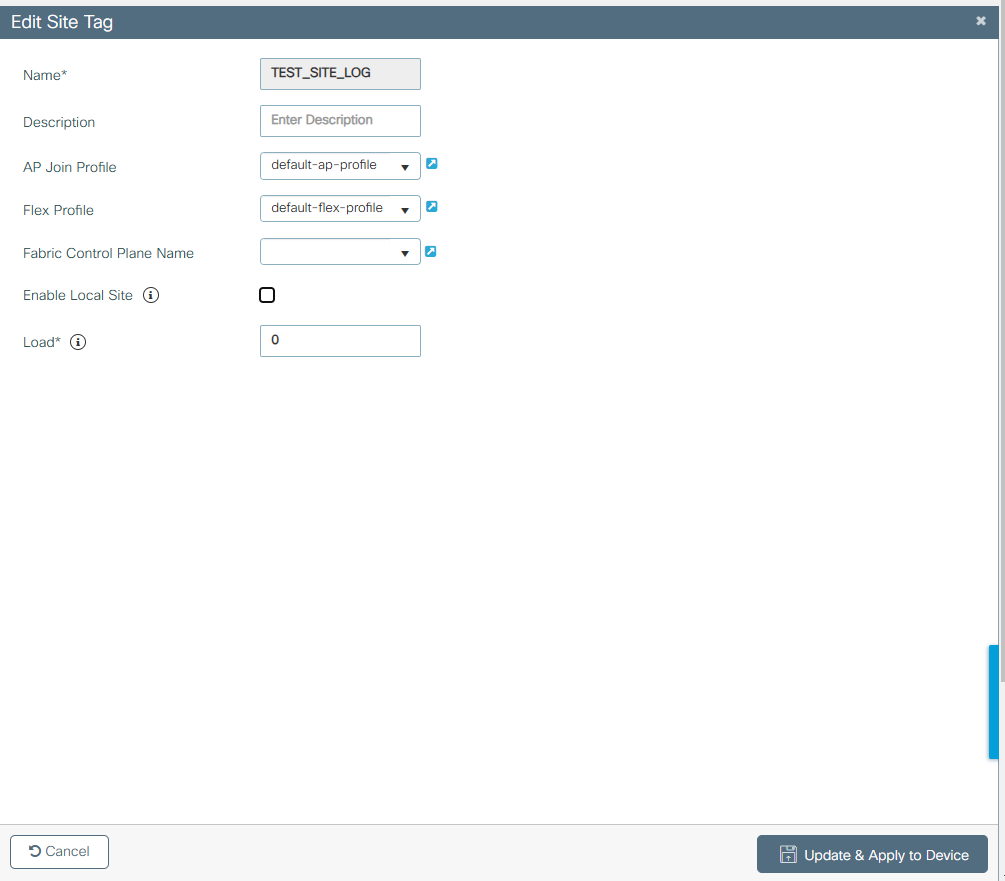
6. TAG 설정 - SITE

Name: TEST_SITE_TAG
아래처럼 설정 합니다.

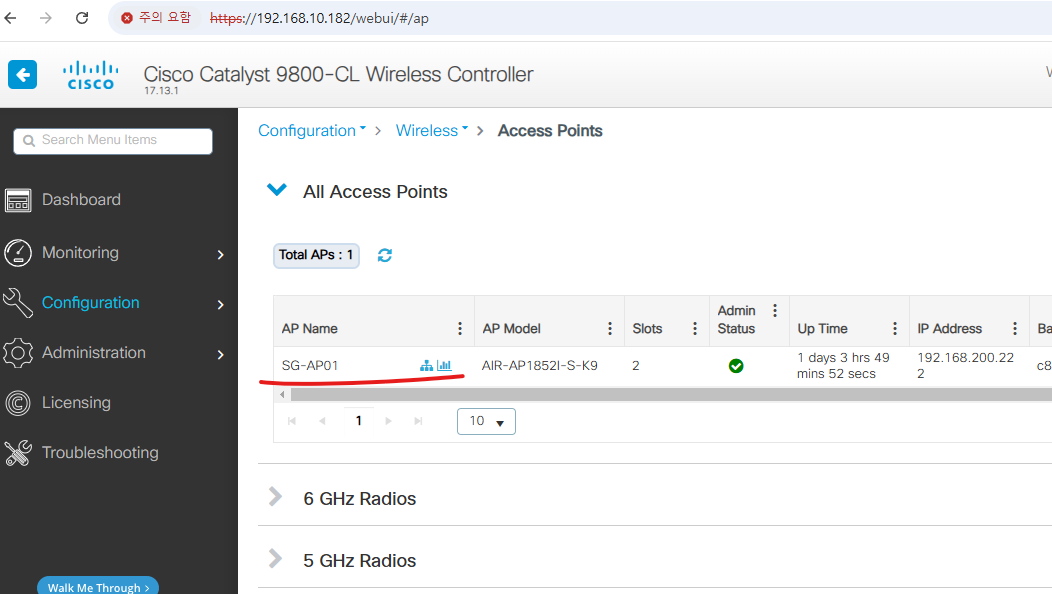
6. AP에 TAG 설정


7. 설정값을 적용하면 AP가 재부팅이 됩니다.
8. WLC VLAN110에 대해서 DHCP Rely설정

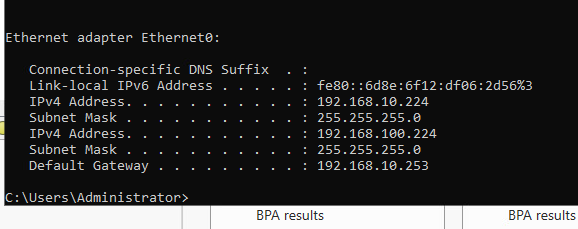
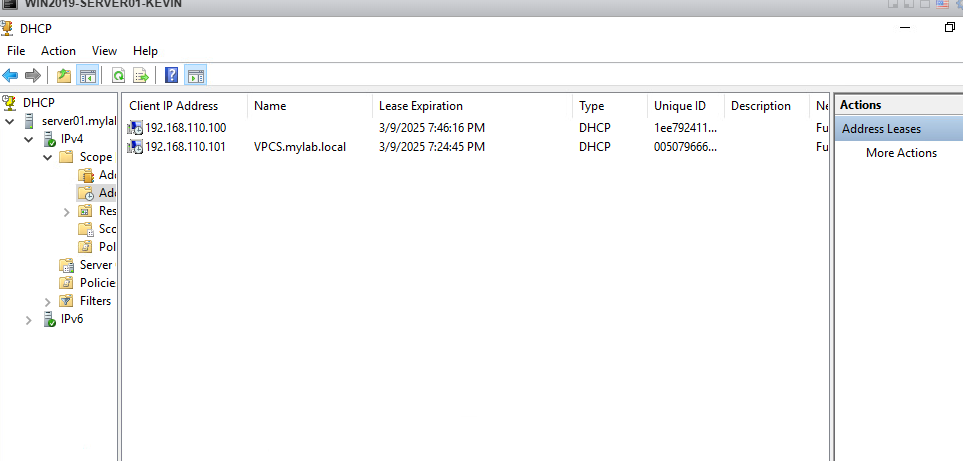
9. 서버 IP주소 확인

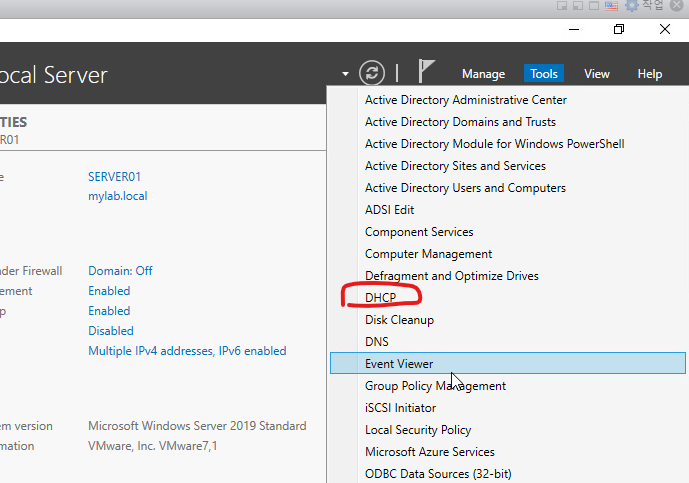
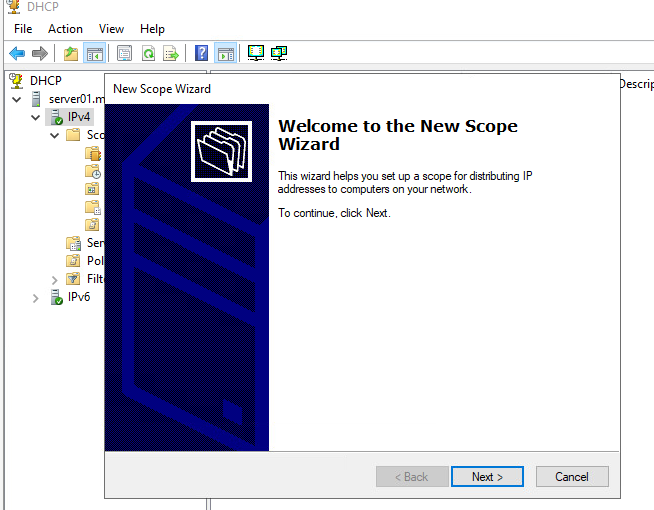
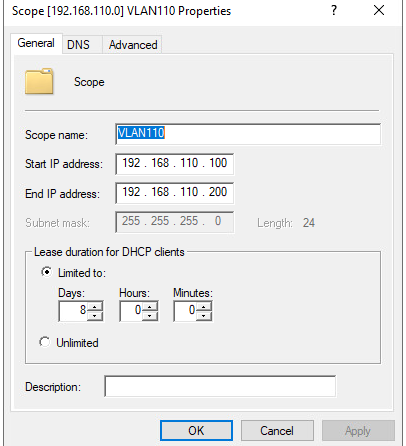
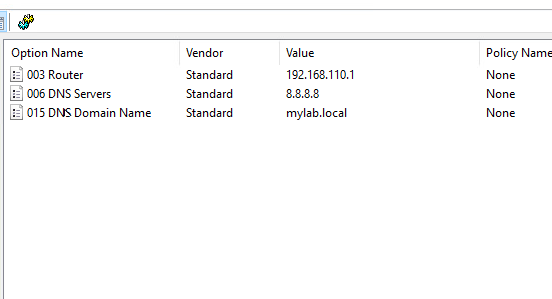
윈도우서버에서 DHCP 서버 설정


10. 백본 스위치에서 DHCP Relay 설정
| interface Vlan110 ip address 192.168.110.1 255.255.255.0 ip helper-address 192.168.10.224 |
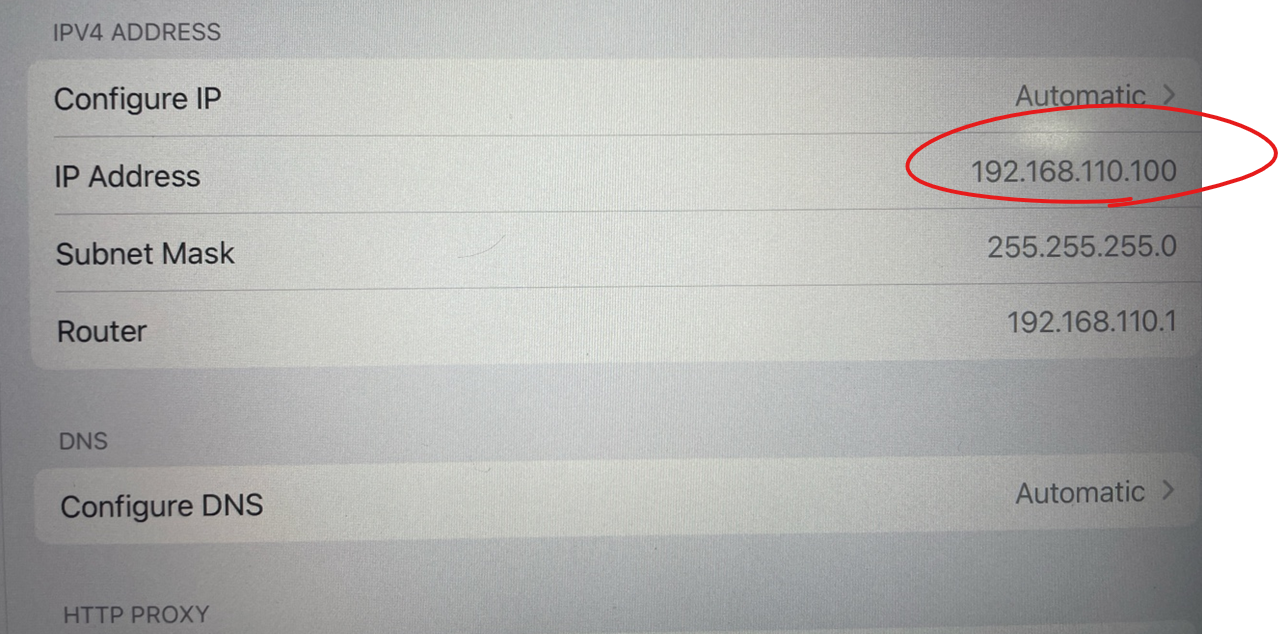
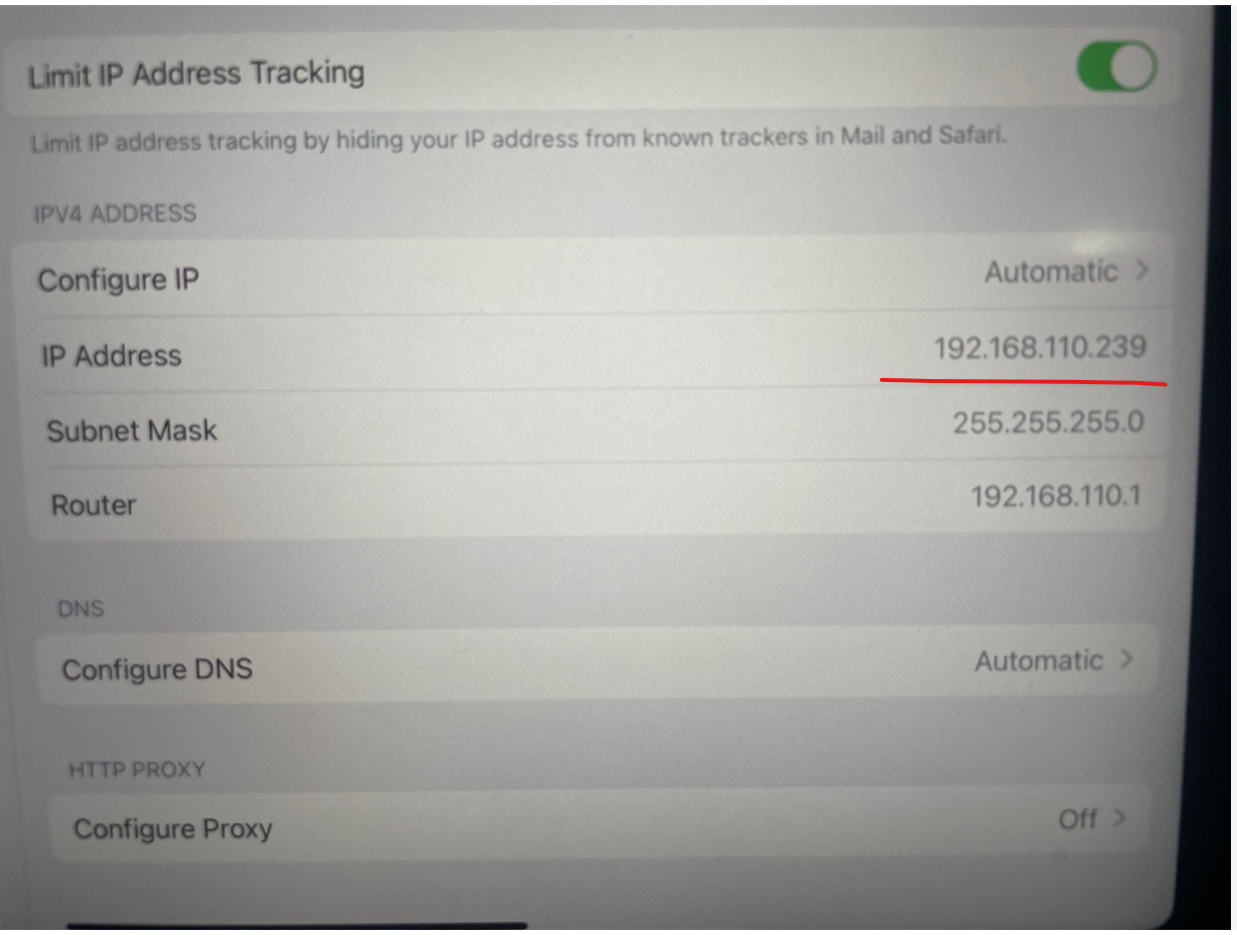
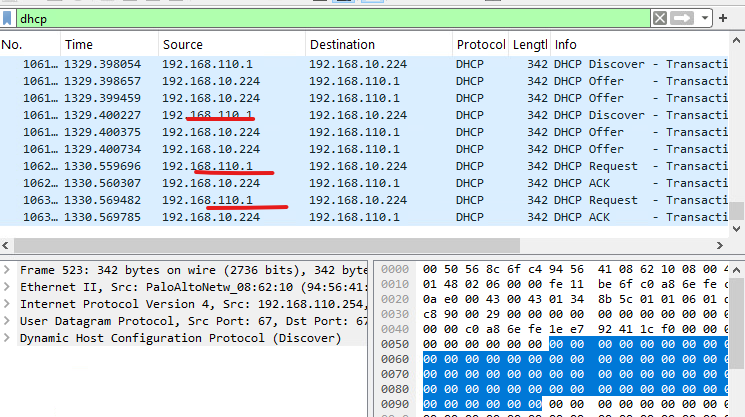
11. Client 에서 TEST01를 접속하고 IP주소를 확 합니다.


11. 서에서 DHCP Binding 확인

지금까지 [C9800CL][#12]- DHCP - option3 - SW dhcp Relay 글을 읽어주셔서 감사합니다.
'CISCO > 무선' 카테고리의 다른 글
| [C9800CL][#14]- DHCP - WLC Internal DHCP - option 5 (0) | 2025.03.01 |
|---|---|
| [C9800CL][#13]- DHCP - WLAN DHCP Relay - option4 (0) | 2025.03.01 |
| [C9800CL][#11]- DHCP Relay (SVI) on WLC - Option2 (0) | 2025.03.01 |
| [C9800CL][#10]- DHCP Bridging - BackBone SW DHCP - Option1 (0) | 2025.03.01 |
| [C9800CL][#9]- WLAN Guest (0) | 2024.12.26 |